Video Walkthrough
Importing User Data into KnowledgeCity LMS: A Step-by-Step Guide
Managing the onboarding and continual updating of learner information is critical in any educational environment. KnowledgeCity has simplified this process with the Import Data feature, allowing for bulk additions and updates to user profiles. In this KnowledgeBase article, we'll provide an easy-to-follow guide on how to import user data into KnowledgeCity LMS.
Access the Import Data Feature
Getting Started:
- Log into the KnowledgeCity LMS as a Super Admin or a standard administrator with access to the "Import data" page.
- From the dashboard or home page, navigate to the left side panel and click on the "Import data" option.
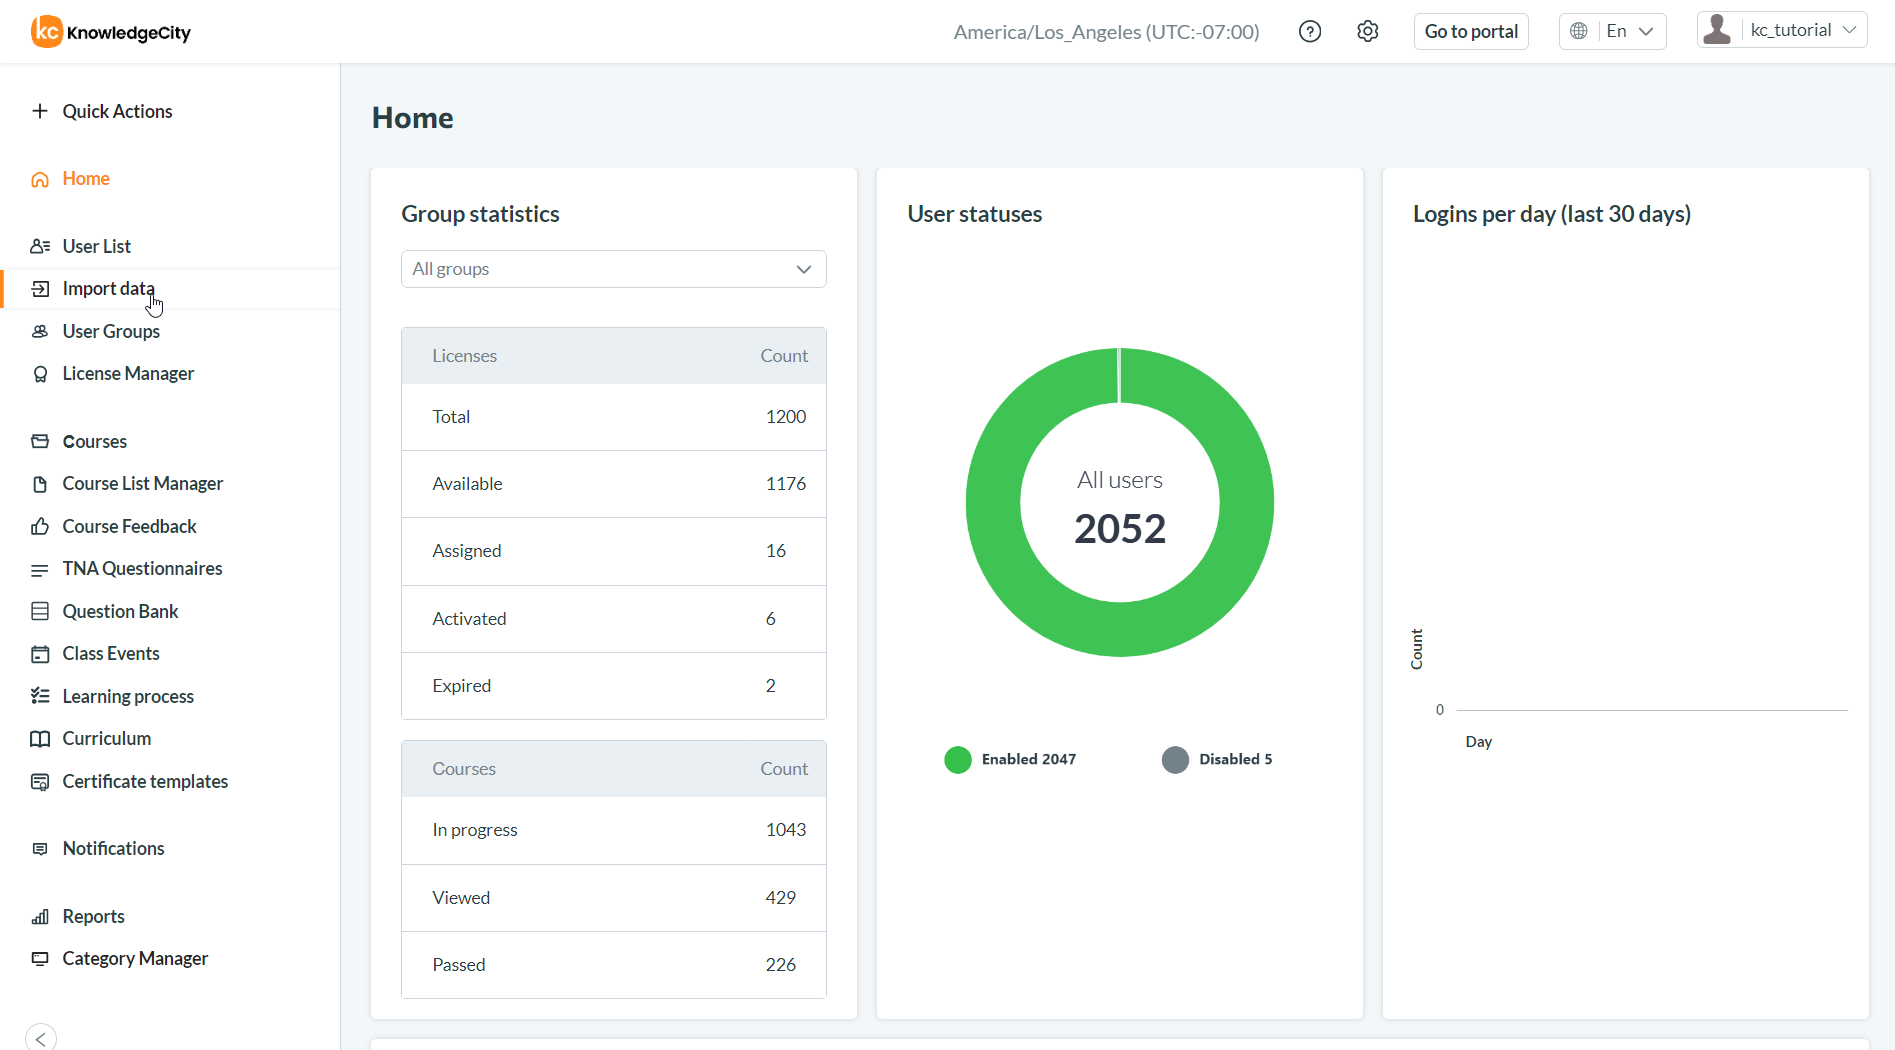
An example illustration highlighting the "Import data" option found in the LMS left panel.
Prepare the User Data
Download the Import Template:
- Click on the option in the top right corner of the page to download an import template.
- The downloaded template will be prefilled with column headers for mapping your user data to LMS fields.
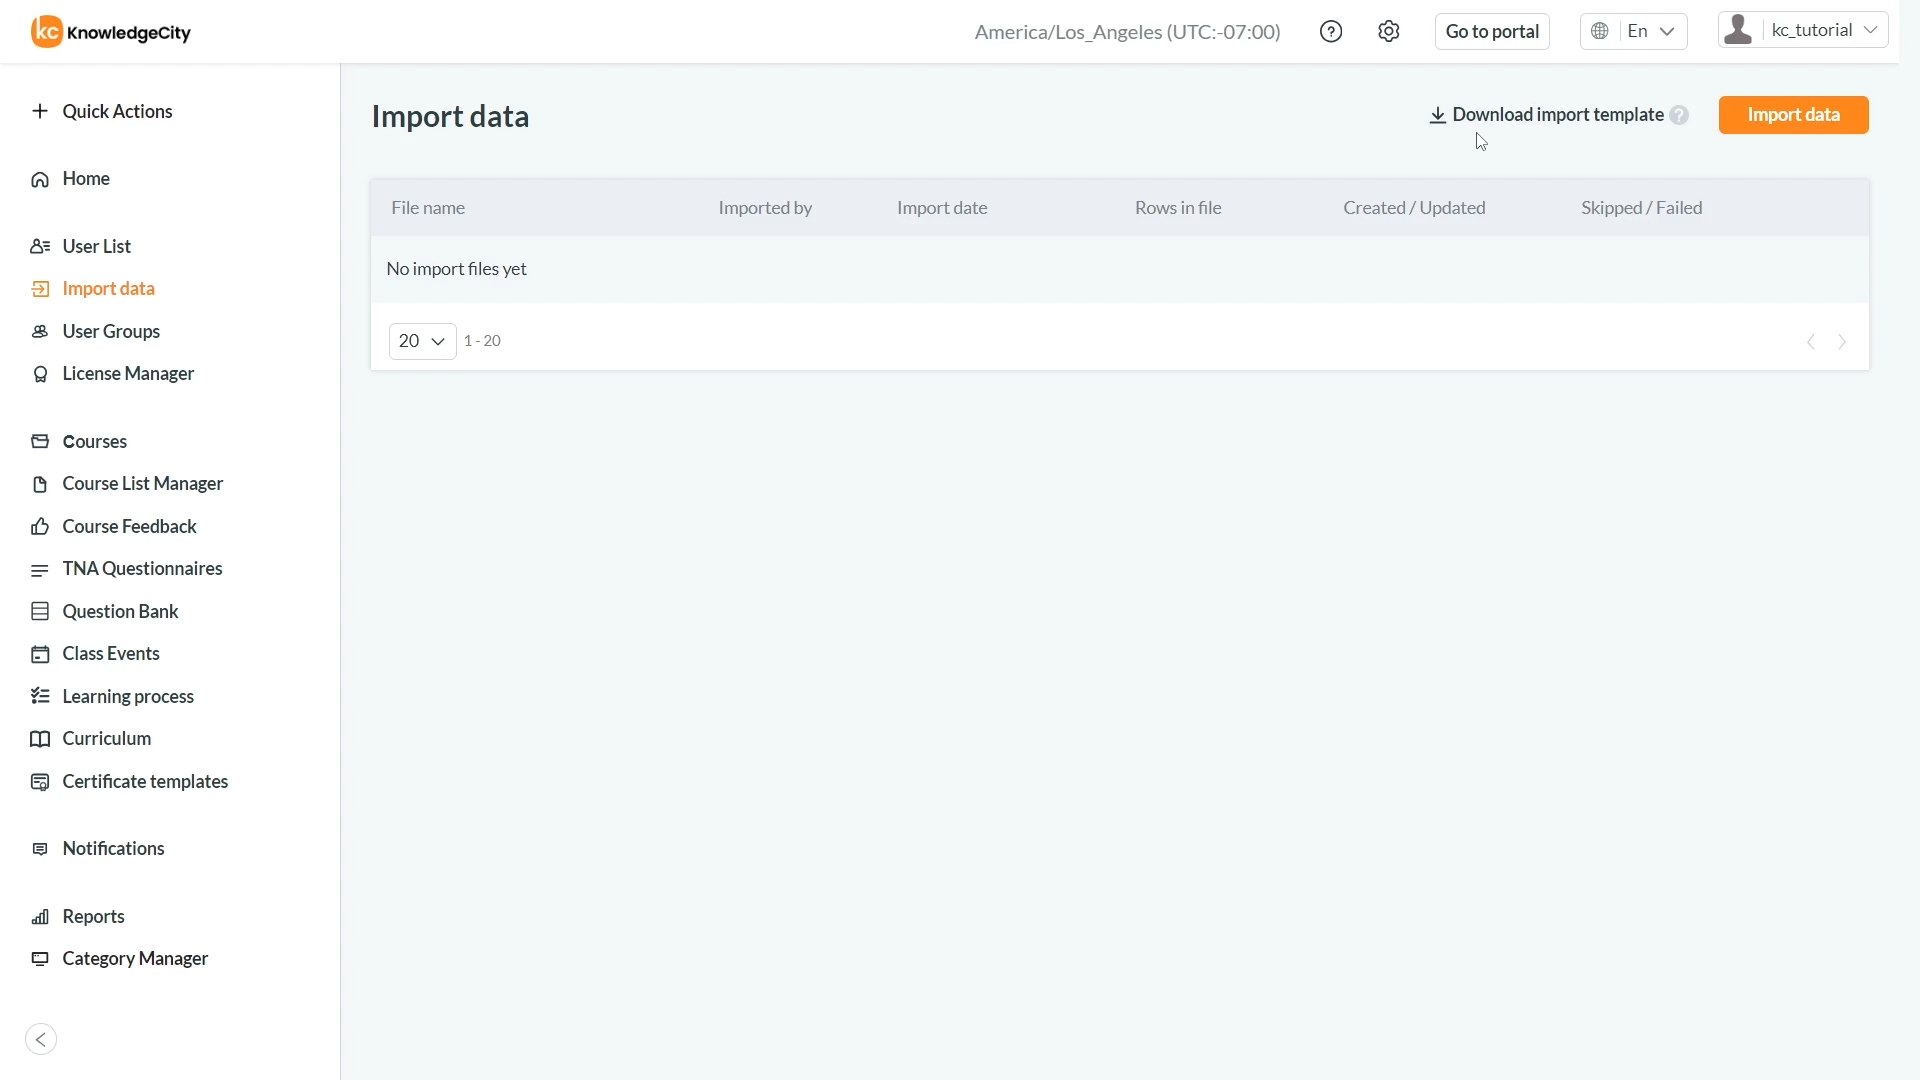
An example illustration highlighting the option to download the import template in the Data Import page.
Fill in User Information:
- Open the template and input information for all users requiring import or update.
- Essential fields include Username, First Name, Last Name, Email Address, Employee ID, and at least one Group assignment for new users.
Note: While the Email Address and Employee ID fields are not necessarily required, they are highly recommended for efficient management of your user base. - Non-essential field columns in the template sheet can be removed if they do not apply to your import/update.
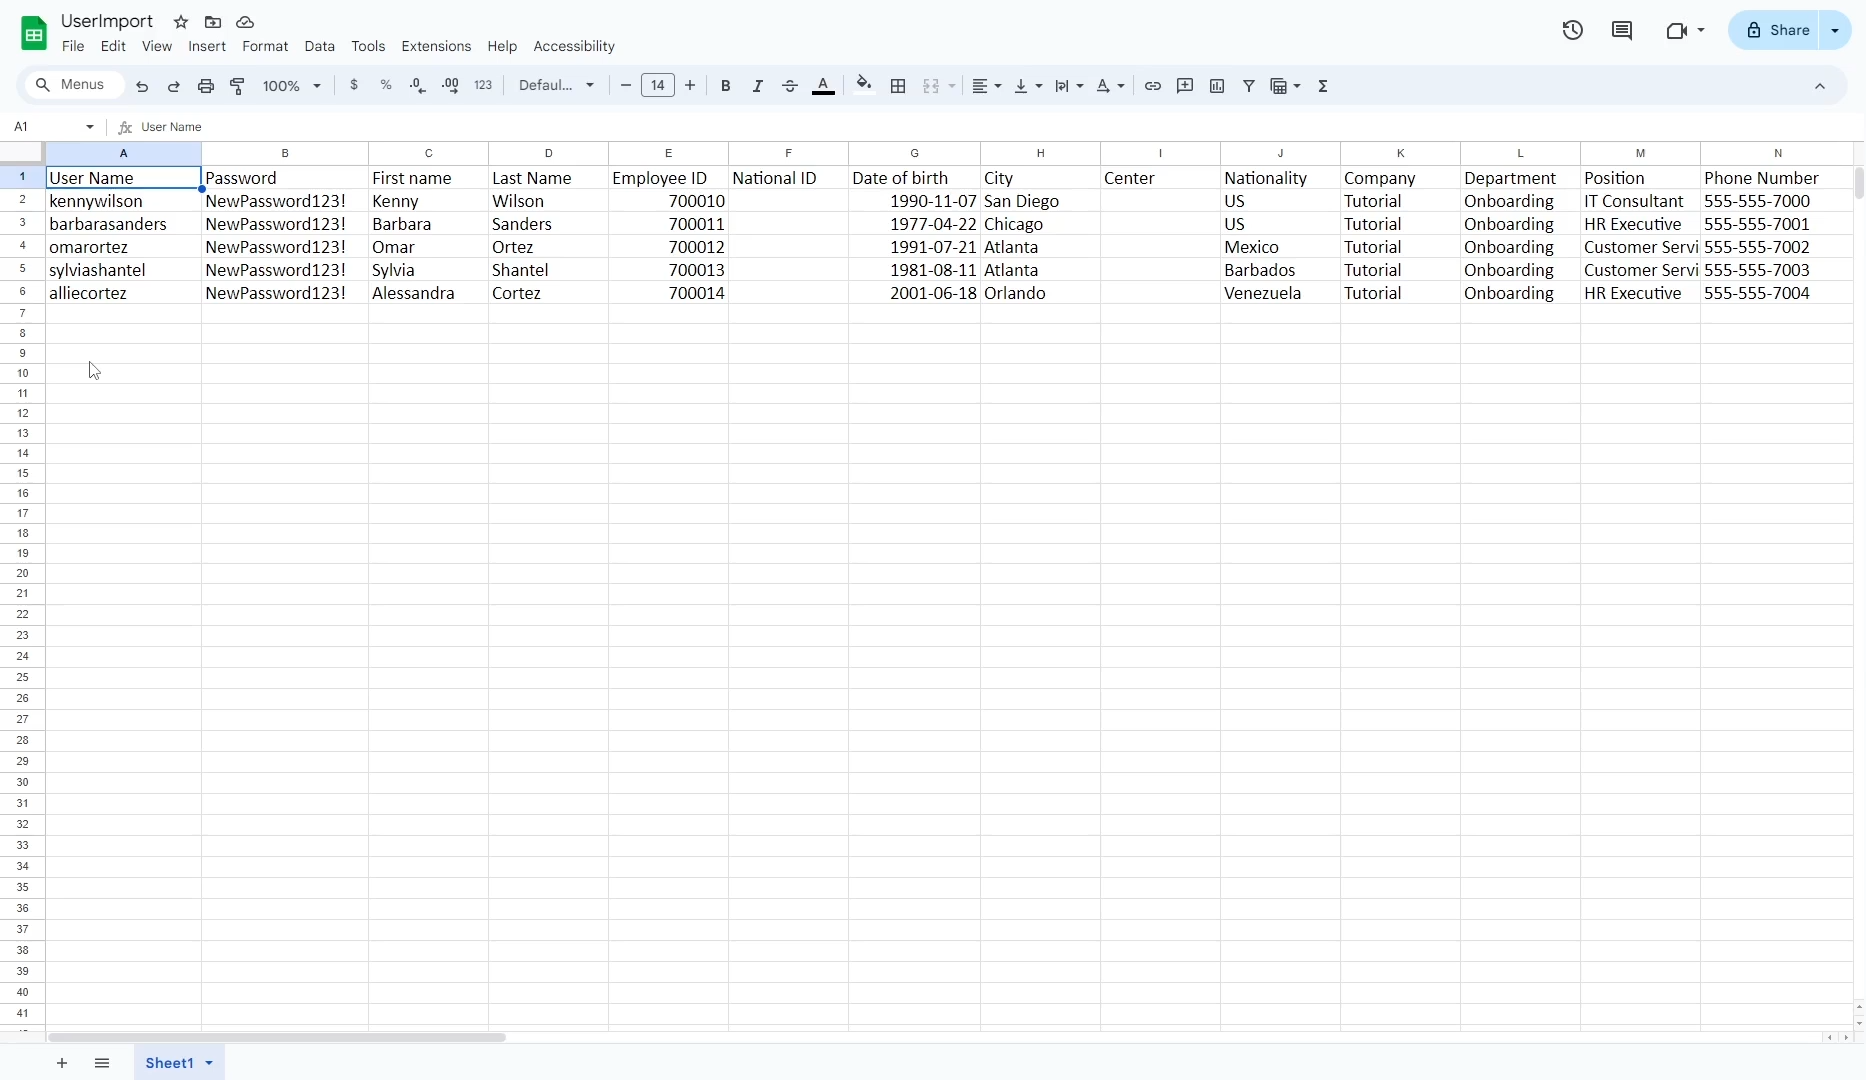
An example user sheet using Google Sheets with columns from the import template file.
Understand the Template:
- The template includes optional fields for additional information such preferred language, gender, secondary email address, alternative phone numbers, etc.
- Many of the fields are not required but serve to aid you in the management of your user base.
- Column rows in the template can be left empty/blank if they do not apply to your users.
Assign Subscriptions and Groups:
- To automatically assign a license to the users being added, fill in the subscription column rows with a Subscription Name. License assignment is not required for a successful import. If subscriptions are not specified in the sheet, all users can be assigned licenses from a specific subscription in the "Import options" step.
- Add users to relevant groups, such as department-specific groups, for the purpose of course assignments through group Learning Paths, and for more efficient management of your learners. If groups are not specified in the sheet, all users can be assigned to a group in the "Import options" step.
Import the File
-
Save Your Spreadsheet:
Save the completed spreadsheet with all user information in Excel (.xlsx), CSV (.csv), or Open Document Spreadsheet (.ods) format. -
Upload the File:
Click on the "Import Data" button found in the top right corner on the import page. You may "drag and drop" the properly formatted file onto the page, or use the upload button. -
Match Data to LMS Fields:
- A table will display each header column from your file alongside the LMS profile fields.
- Ensure all data matches accurately before proceeding.
- If needed, columns may be skipped during the import/update using the "Skip" toggle action for each non-essential field.
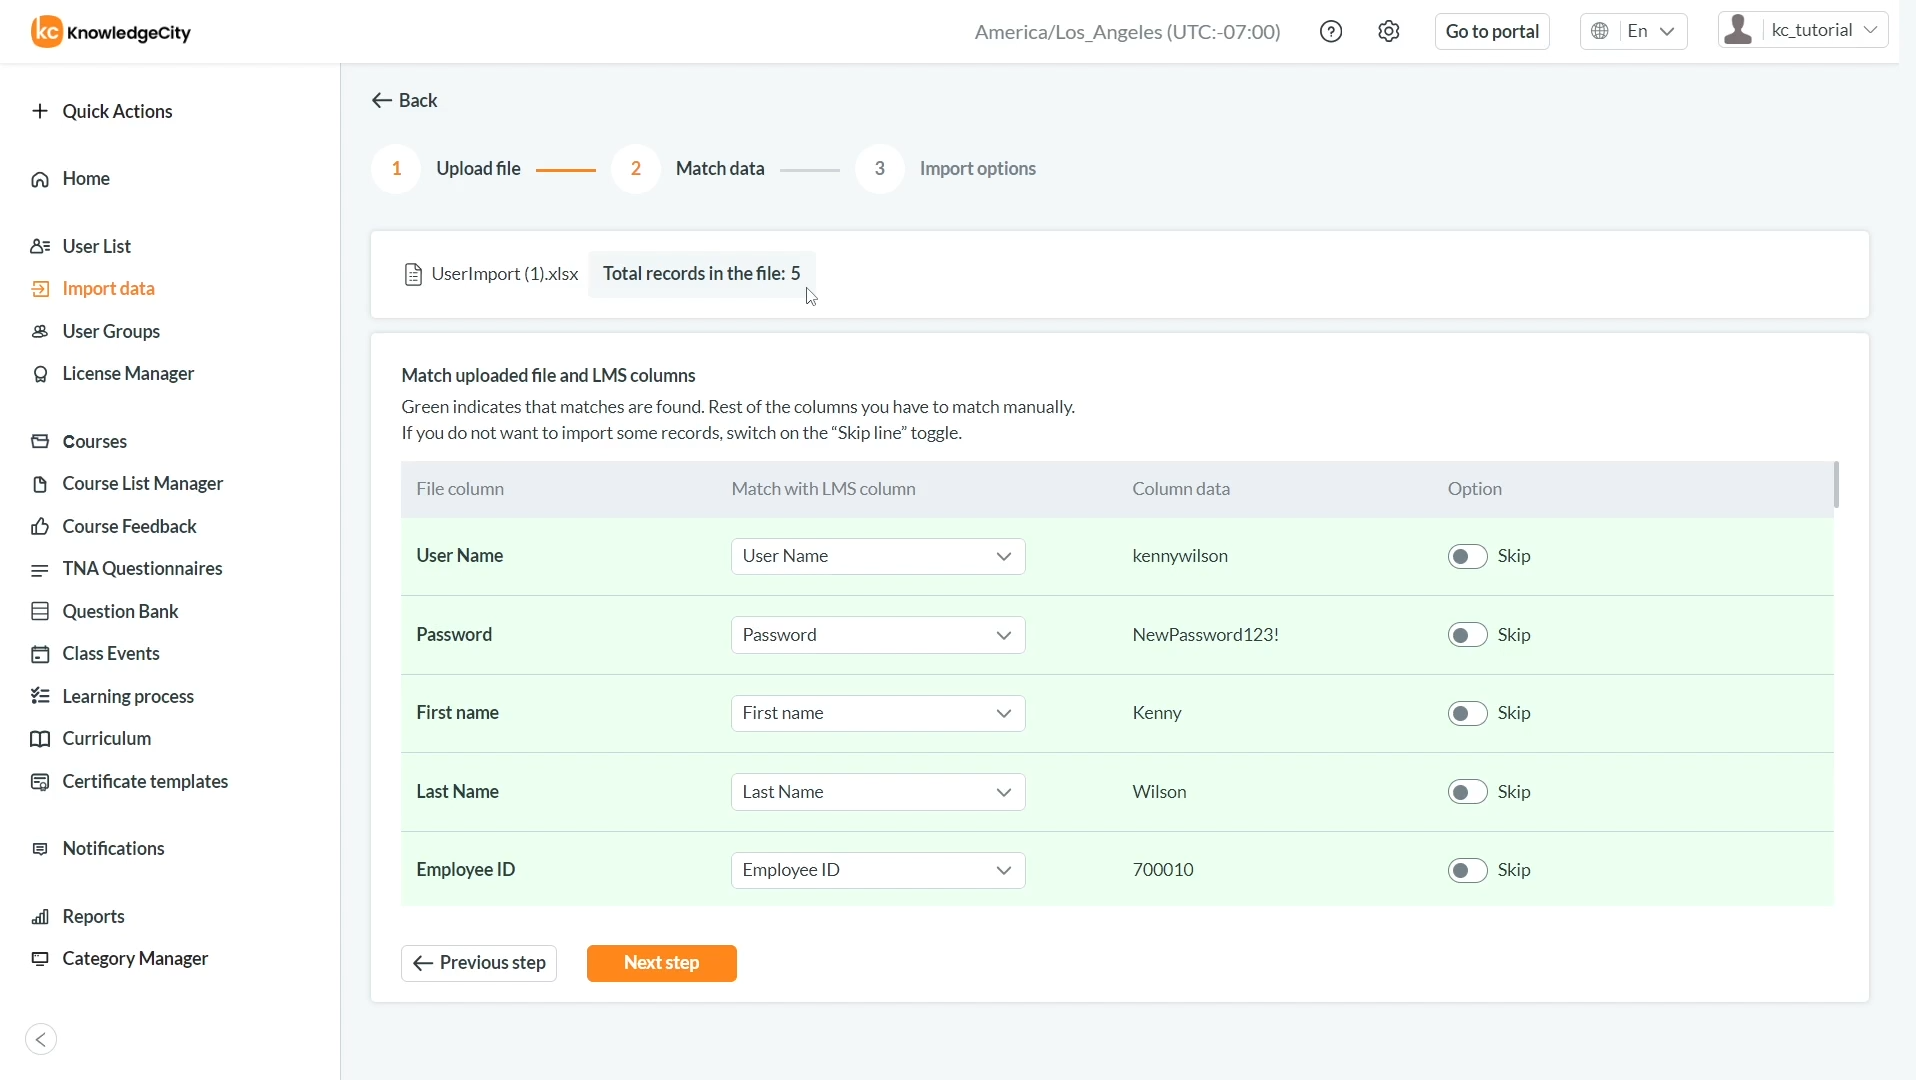
An example illustration of the "Match data" step of the Import data feature.
Configure Import Options:
-
- Choose to either import new users, update existing users, or both.
- Decide on matching criteria (Email, Employee ID, or Username).
- Group assignment can be selected for all users if specific groups have not been mapped from the sheet.
- A subscription can be selected for license assignment to all users if specific subscriptions have not been mapped from the sheet.
- Automatic username generation and password settings can be configured if needed.
- Specify if users should be notified upon account creation or not.
Note: If the Notifications setting is disabled in your Account Settings, new users will not be notified even if this option is selected.
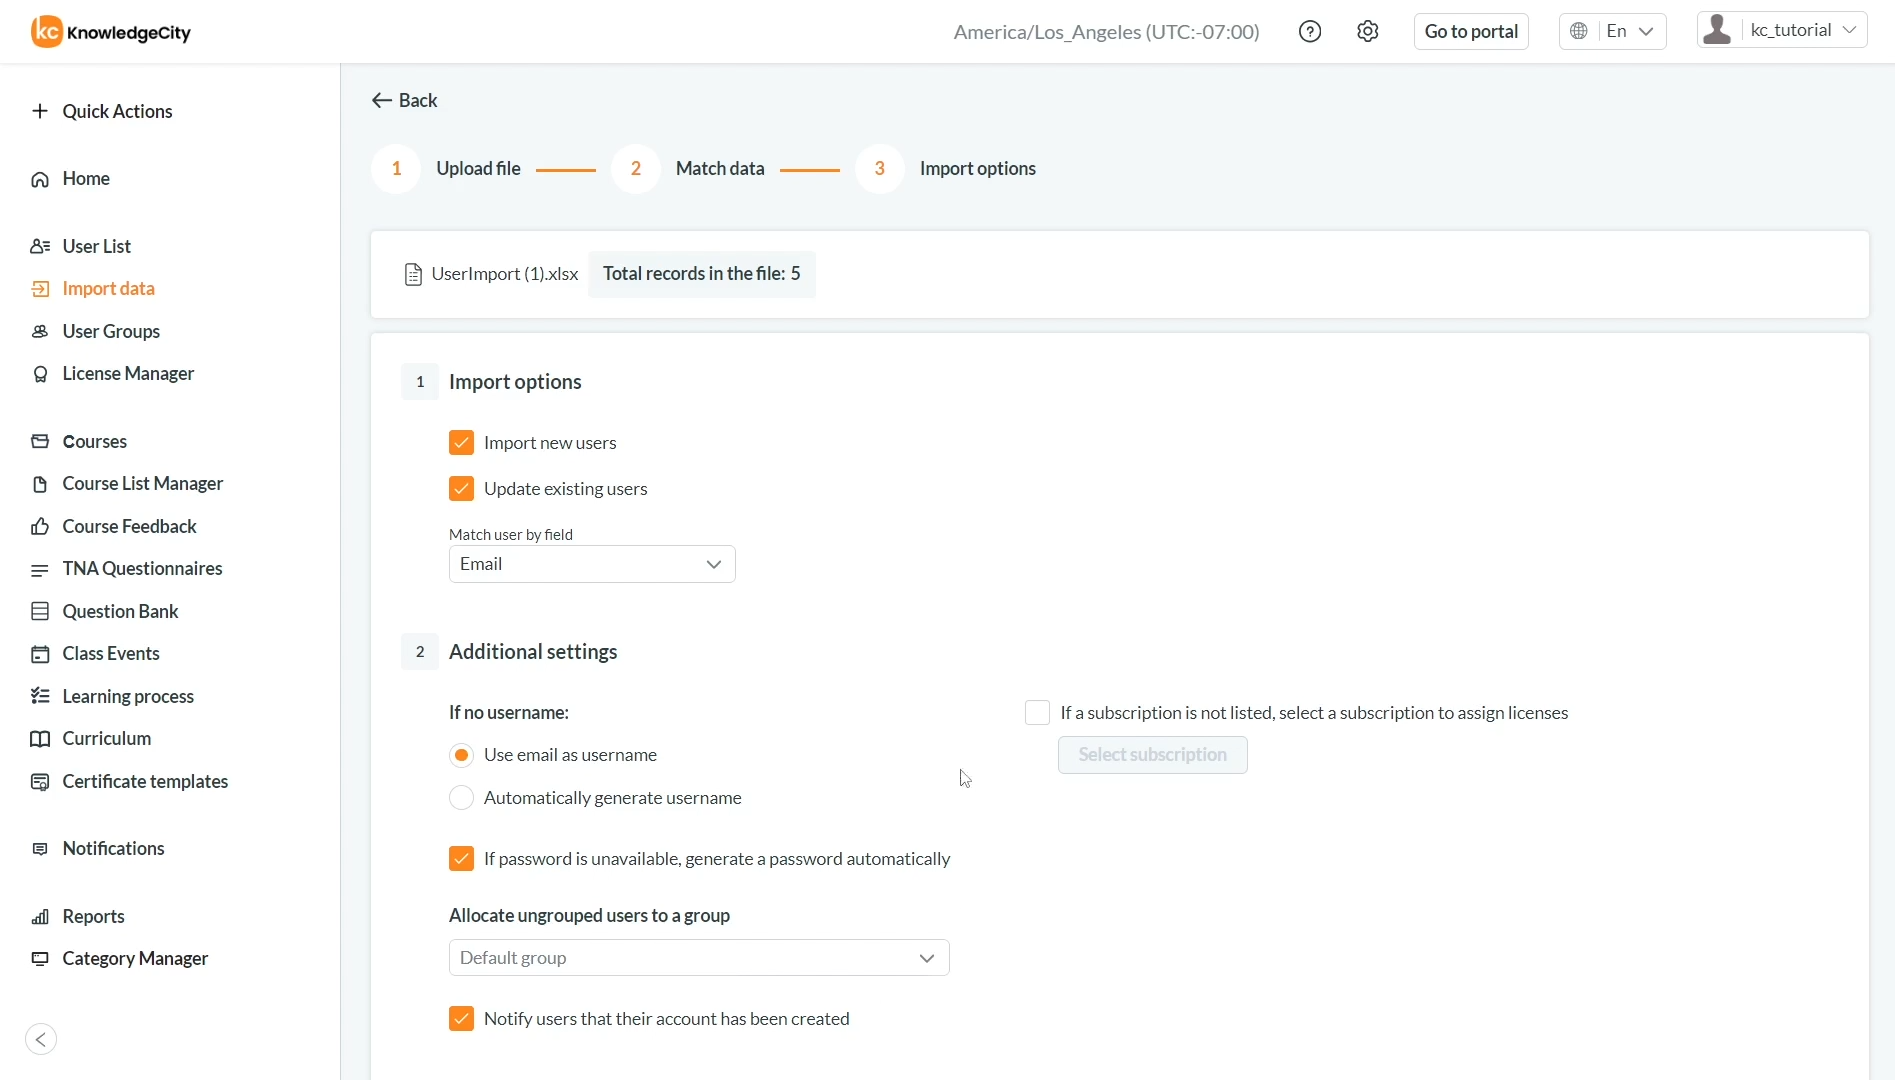
An example illustration of the "Import options" of the Import data feature.
Finalizing the Import Process
-
Start the Import:
- After verifying all data and settings, click the "Start Import" option.
- The system will begin validating and processing the data.
-
Validate the Data:
- A notification will appear confirming the validation of the data.
- The page will display the number of users created or updated. If any failures to import/update occurred, this information will be provided in the import record table.
-
Understand the Import Summary:
- After processing, the page will list each file processed, the operator, and the date of import.
- A download icon allows for the retrieval of the file used for the import for record-keeping purposes.
-
Address Manual Changes:
After import/update, you may choose to navigate to the User List to verify the changes. If any manual adjustments are required post-import, navigate to the user list page of the LMS to make the necessary changes. -
Simultaneous Import/Update Jobs:
The Import data feature enables the simultaneous processing of multiple files by placing them in a queue. This ensures efficient and orderly handling of large volumes of data. The admin may navigate to other areas of the LMS while the current file is in processing, and optionally choose to import additional files to be ran in queue. -
Stop Import/Update Jobs:
Once in progress, an Import/Update job can be stopped with the red "Stop" button available on the right-side of the table. This will cancel the job where it was in the process when the action was performed and no further additions/updates will be performed.
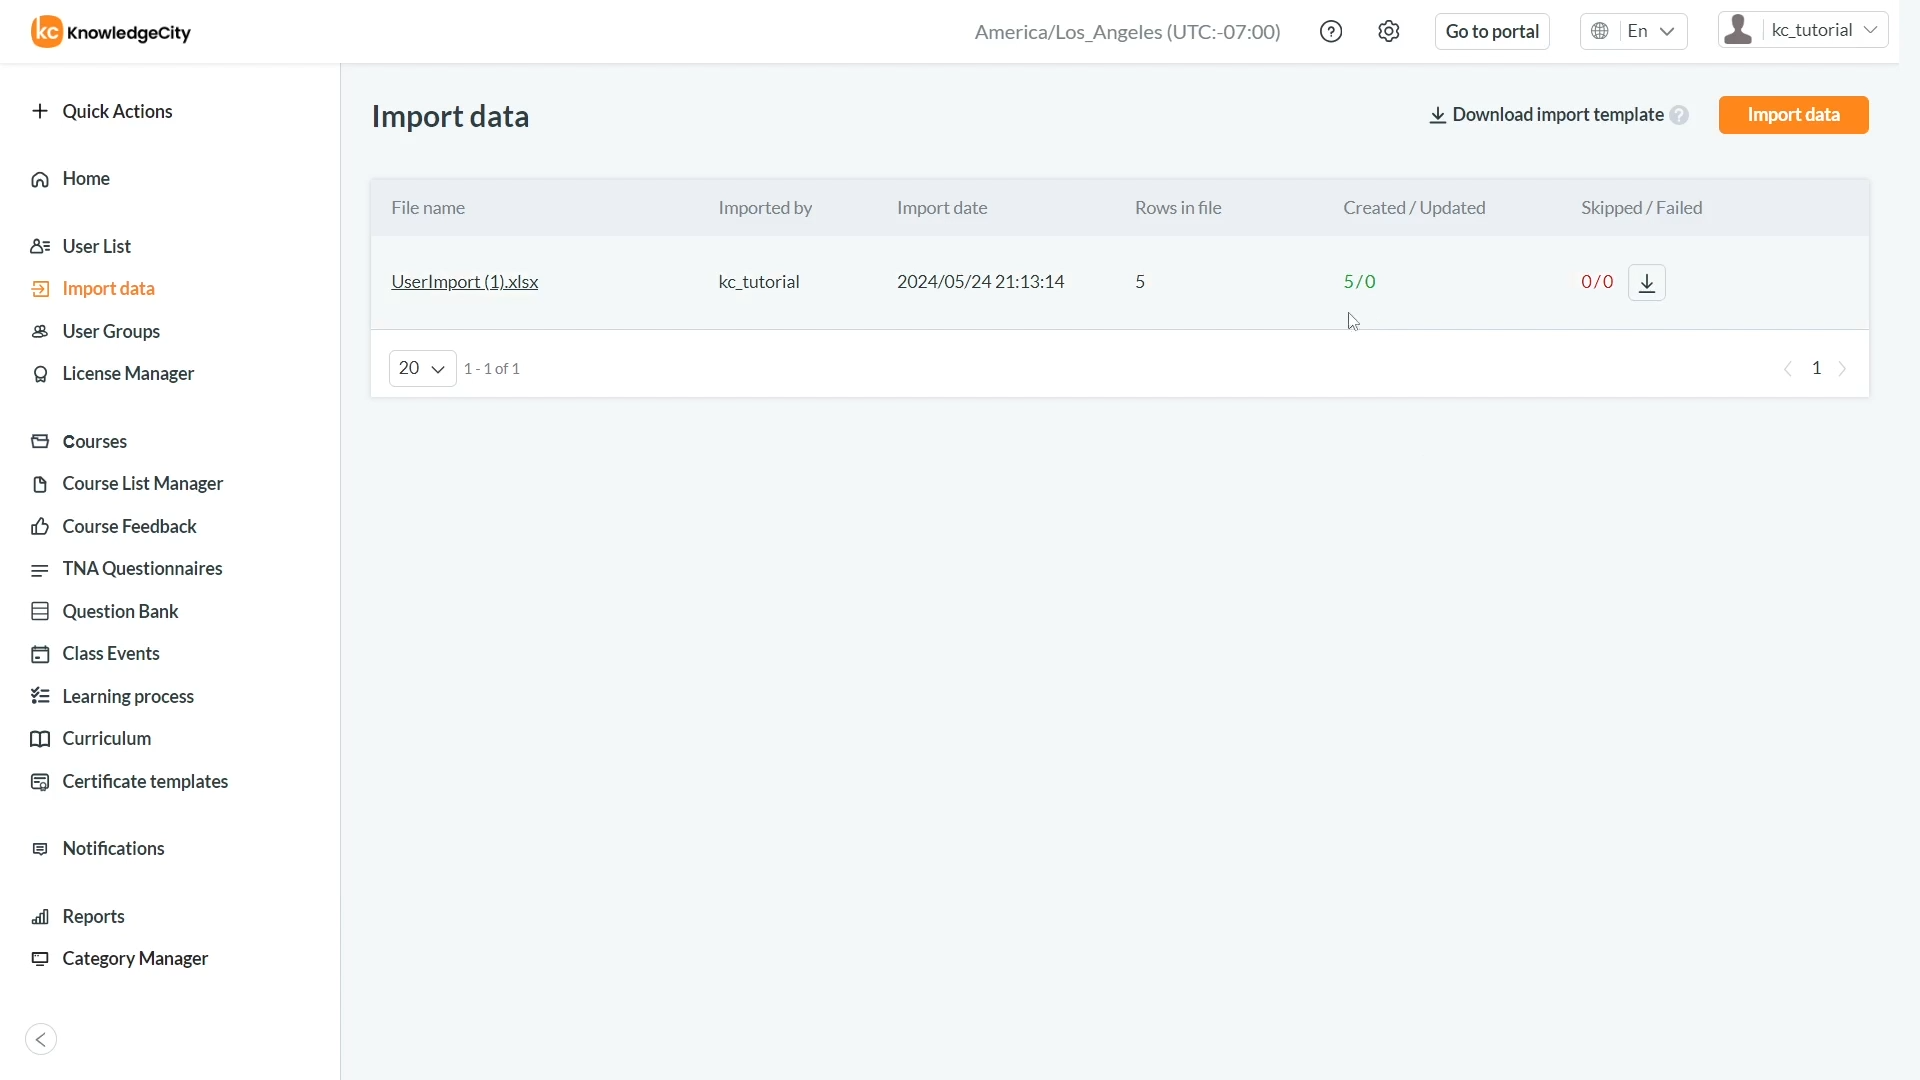
An example illustration of the final validation table after the import file has processed.
By following these steps, LMS admins can efficiently manage user information, streamlining the process of enrolling and updating user profiles. Always ensure that your user data remains current and accurate by utilizing the Import Data feature. You can review users and groups, including their profile information and assignments to ensure everything is in order. This feature streamlines the process of user management, allowing bulk user updates swiftly and accurately. In addition to this LMS feature, KnowledgeCity offers automation of data import through SFTP or custom integration solutions. Be sure to contact your Success Team if you require any additional support for these features.
Happy Learning!