Video Walkthrough
Step 1: Integrate Zoom with Your LMS
-
Access LMS Settings:
-
Navigate to your LMS dashboard and click the Settings icon (typically located in the top menu bar).
-
-
Select Integrations:
-
From the available options, click on Integrations from the drop-down menu.
-
-
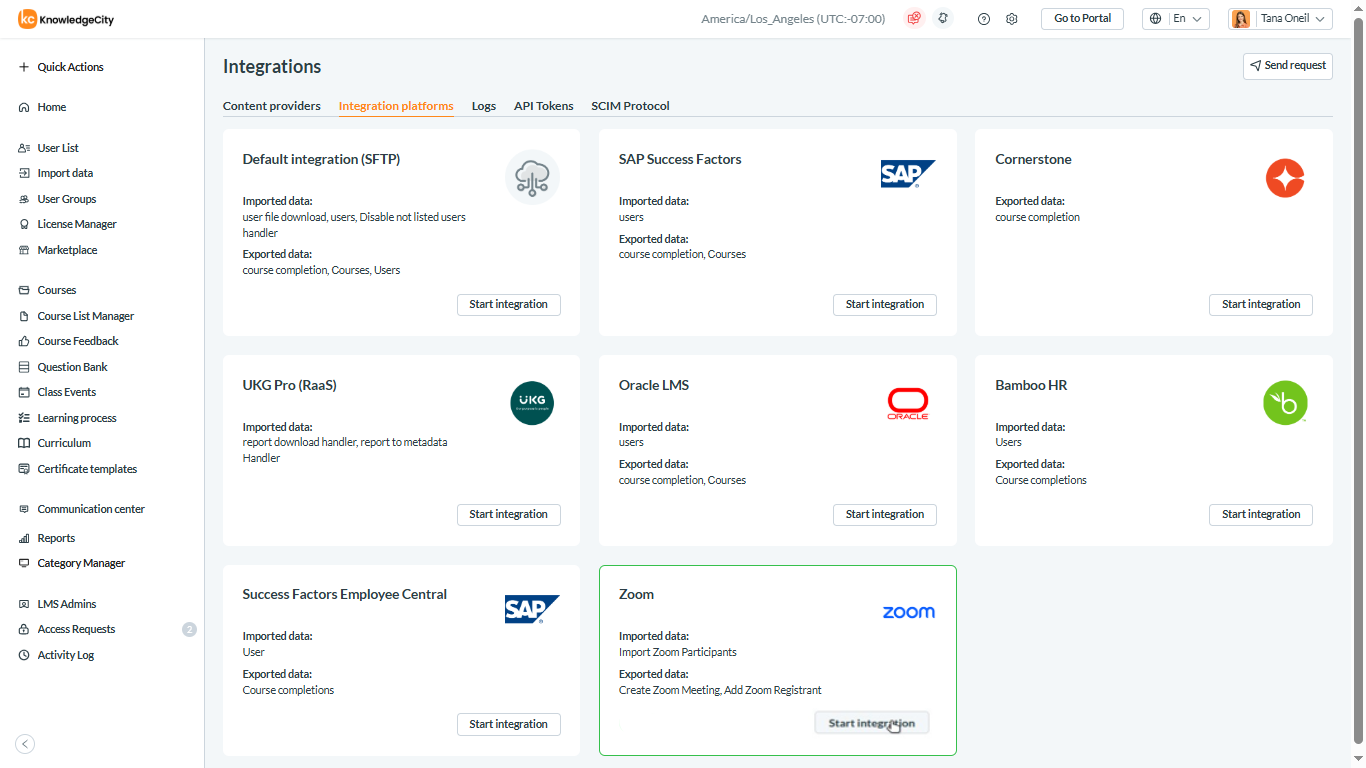
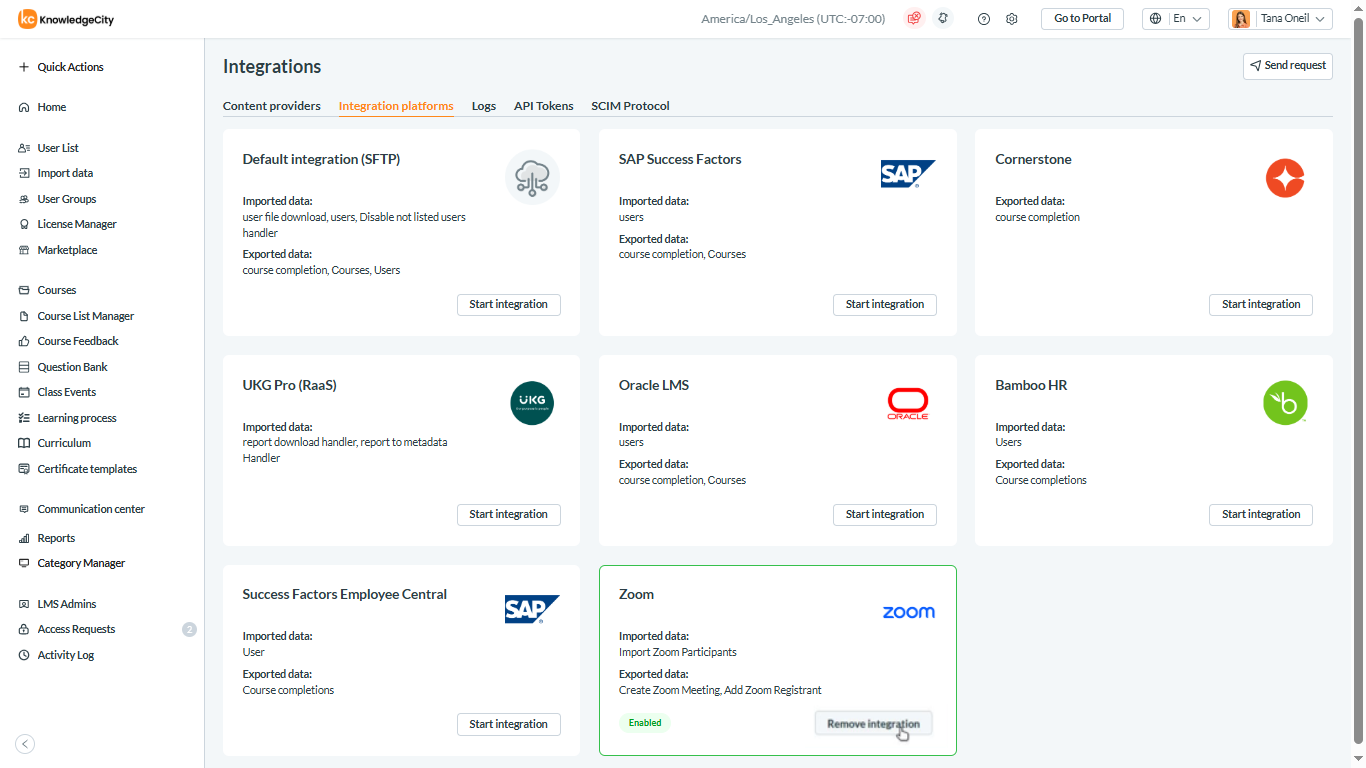
Choose Integration Platform:
-
Once on the Integrations page, select Integration Platforms.
-
-
Initiate Zoom Integration:
-
Locate Zoom within the available platforms.
-
Click Start Integration at the bottom of the Zoom integration panel.
-
-
Grant Permissions:
-
A KnowledgeCity authorization window will prompt you to allow specific permissions required for Zoom integration. An admin account is required to approve the authorization.
-
The system will request access to:
-
View a user’s meetings
-
Create meetings on behalf of a user
-
View meeting participants’ reports
-
-
Click the light blue Allow button to authorize these permissions.
-
-
Confirm Integration:
-
Upon successful integration, a green Enabled indicator will appear at the bottom-left corner of the Zoom integration panel.
-


Step 2: Create a New Course in LMS
-
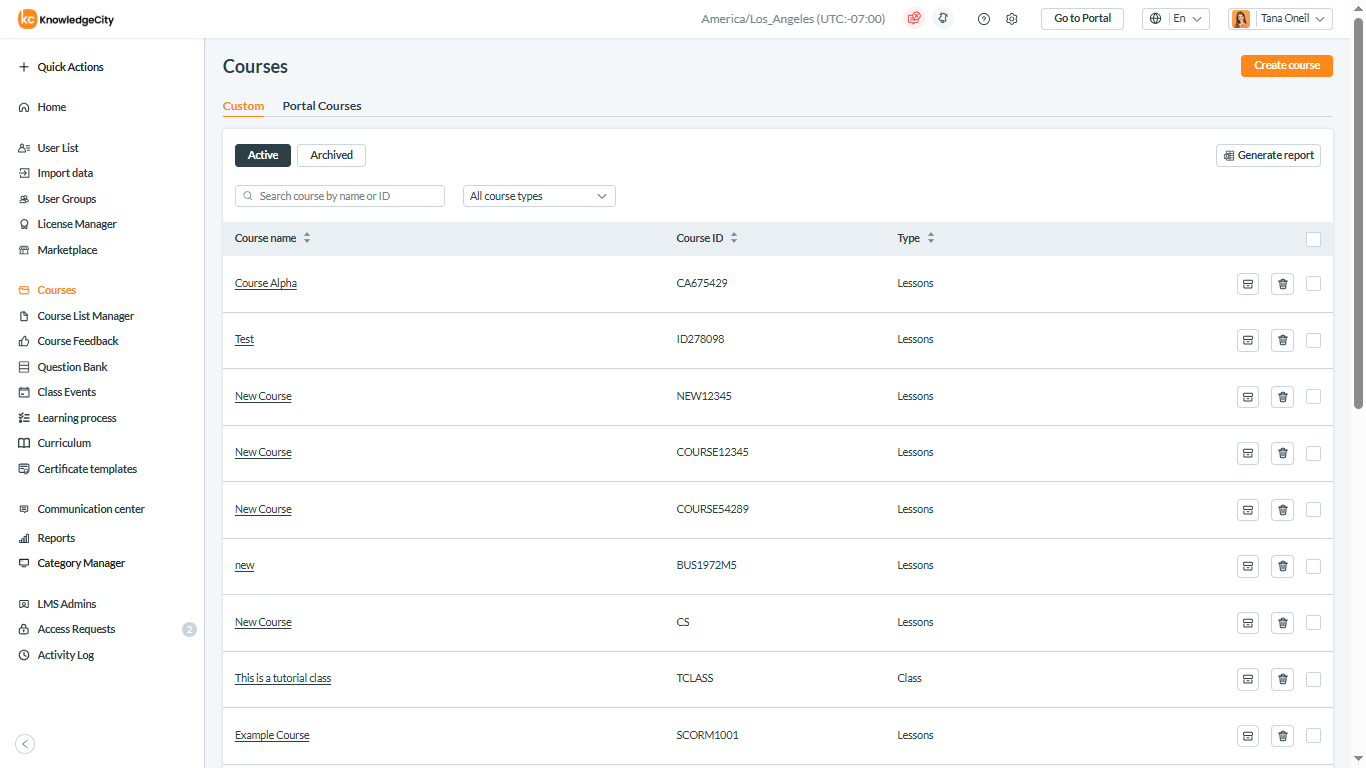
Navigate to Courses:
-
From the LMS dashboard, select the Courses tab.
-
-
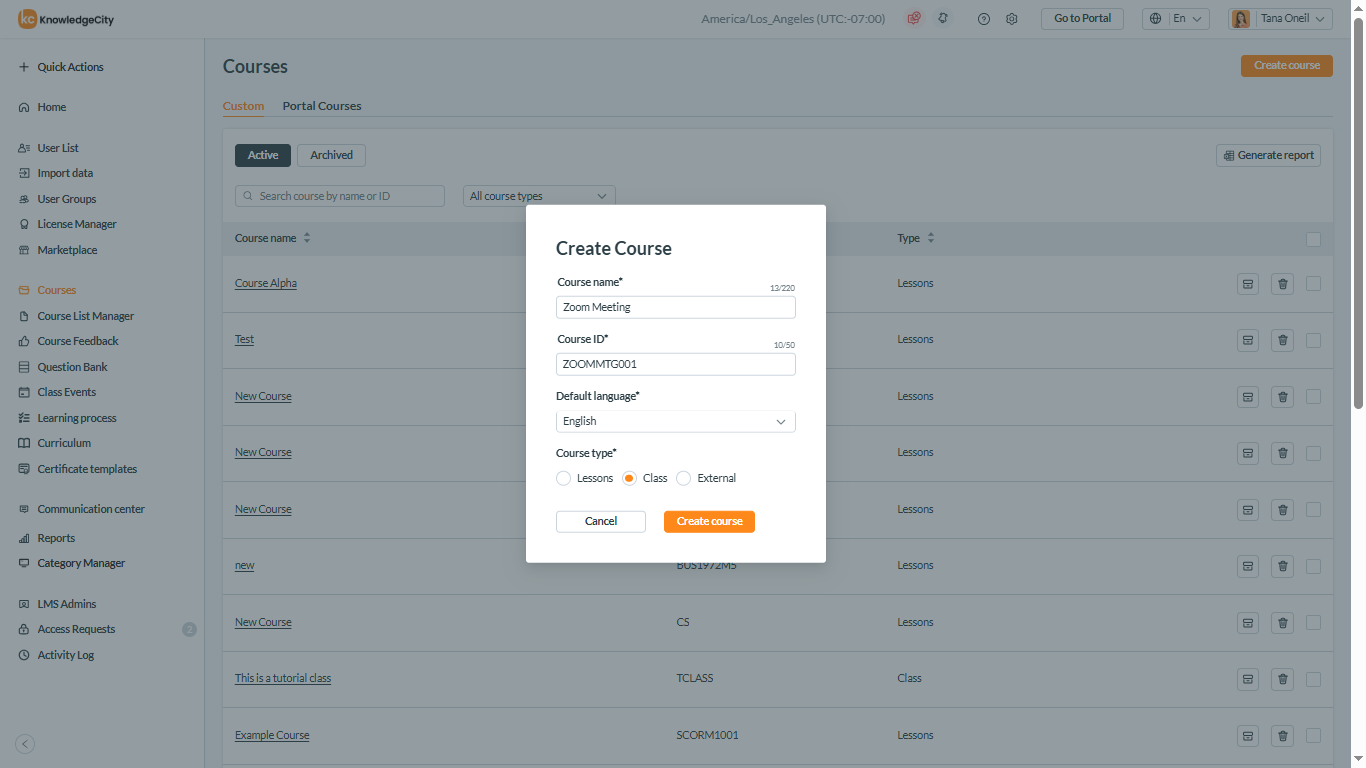
Create a Course:
-
Click the Create a Course button located in the top-right corner (highlighted in orange).
-
-
Set Up Course Details:
-
Enter the required information:
-
Course Name
-
Course ID
-
Language
-
-
Under Course Type, select Class.
-
-
Save the Course:
-
Click Create Course to finalize the course creation.
-
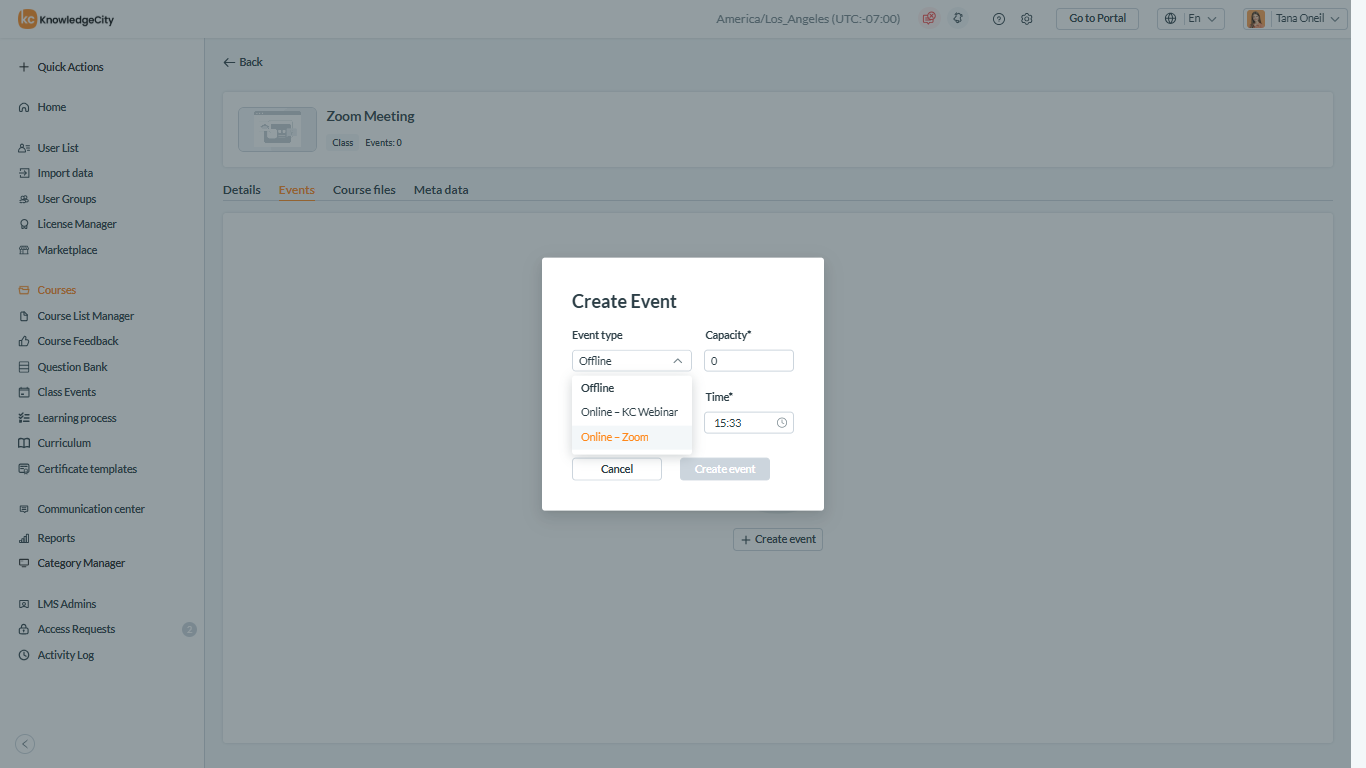
Step 3: Create an Online Zoom Event
-
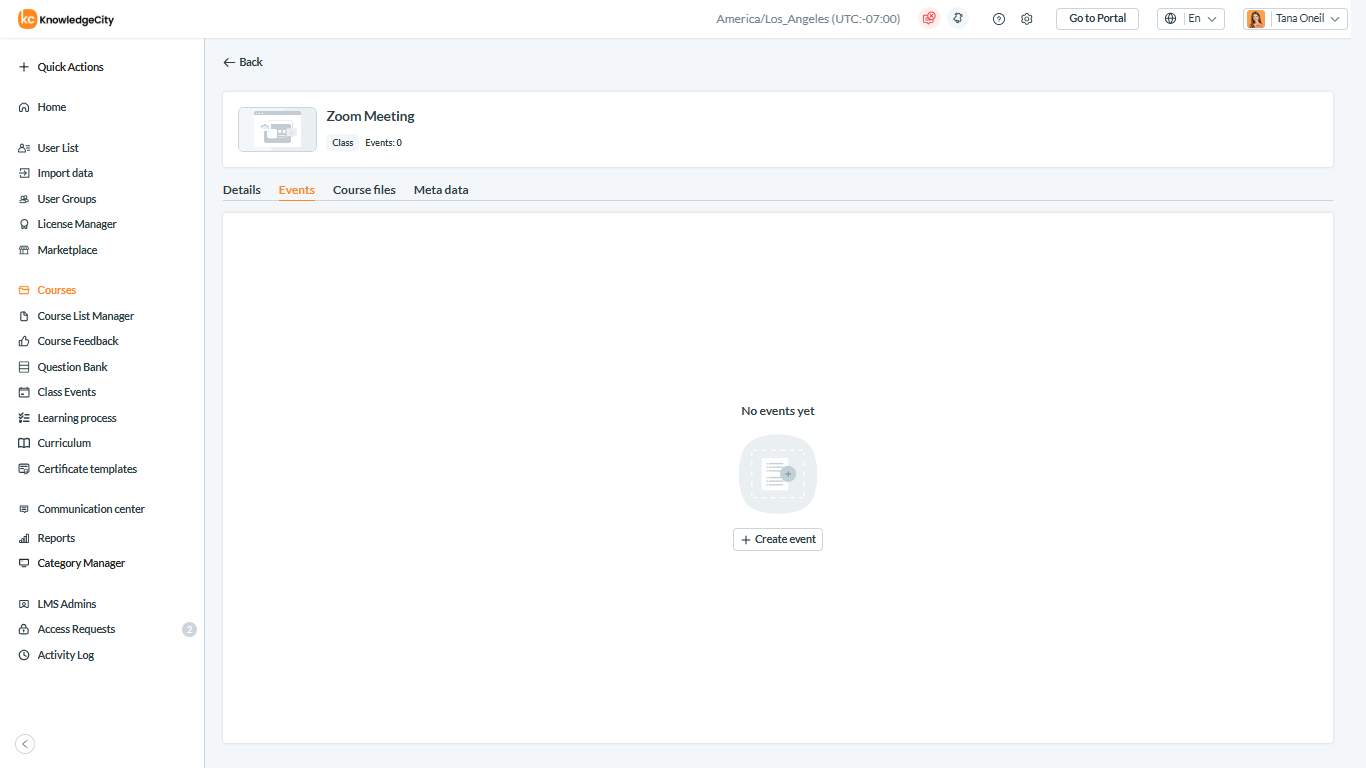
Access the Course Events:
-
Open the newly created course.
-
Navigate to the Events tab.
-
-
Create a New Event:
-
Click + Create Event.
-
-
Configure Event Details:
-
Under Event Type, select Online Zoom.
-
Specify the event Capacity (maximum number of participants).
-
Set the Date and Time for the event.
-
-
Save the Event:
-
Click Create Event to save your event configuration.
-

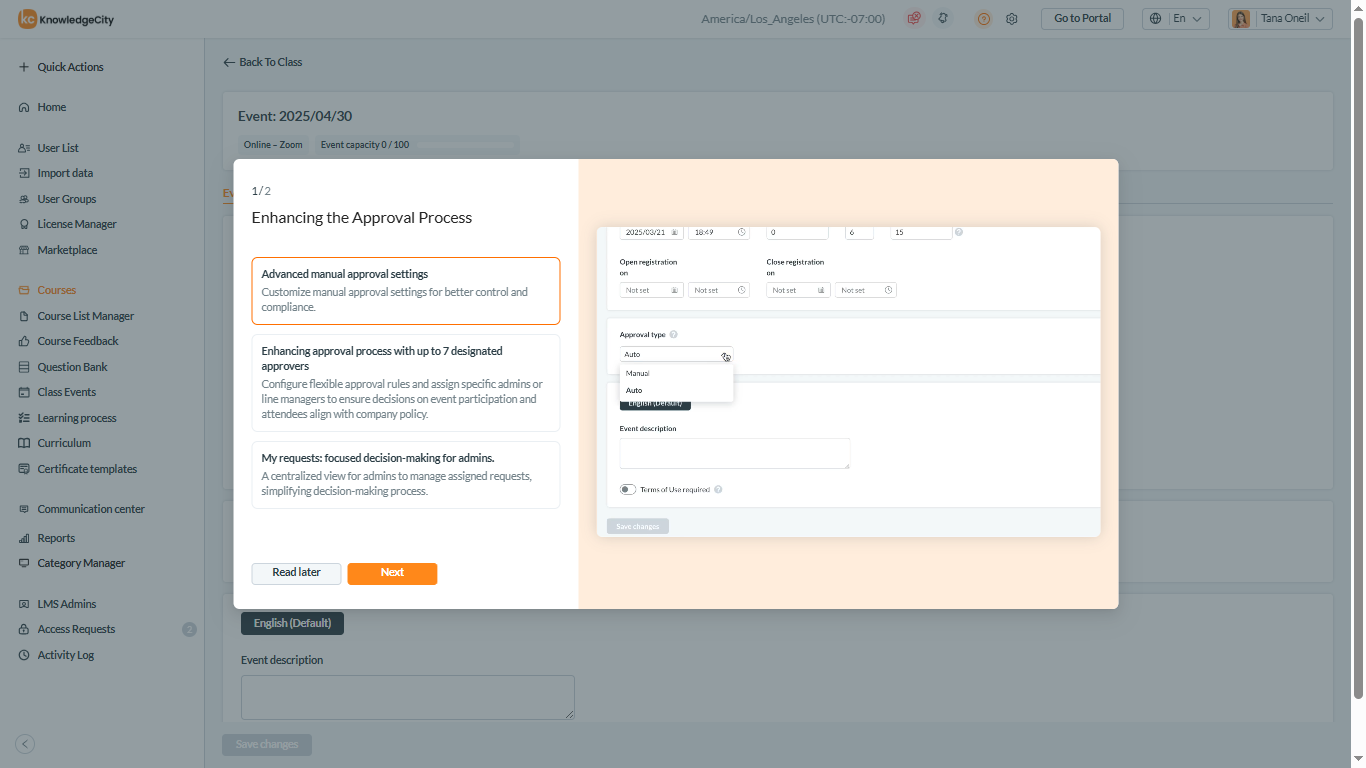
Step 4: Configure Event Settings
-
Approval Process:
-
A pop-up window will appear explaining the enhanced Approval Process
-
-
Publish and Certificate Settings:
-
On the Event Details toggle Publish Events
-
Toggle Issue Certificate to the the desired position.
-
-
Assign Instructor and Add Details:
-
Create and or add the Instructor responsible for the event.
-
Set Event Date, Start time, Min attendees, Capacity and Duration as desired.
-
-
Save Changes:
-
Click Save Changes to apply your settings.
-
-
Publish Event:
-
Upon saving, a Publish Event pop-up window will appear.
-
Confirm by clicking Publish Event.
-


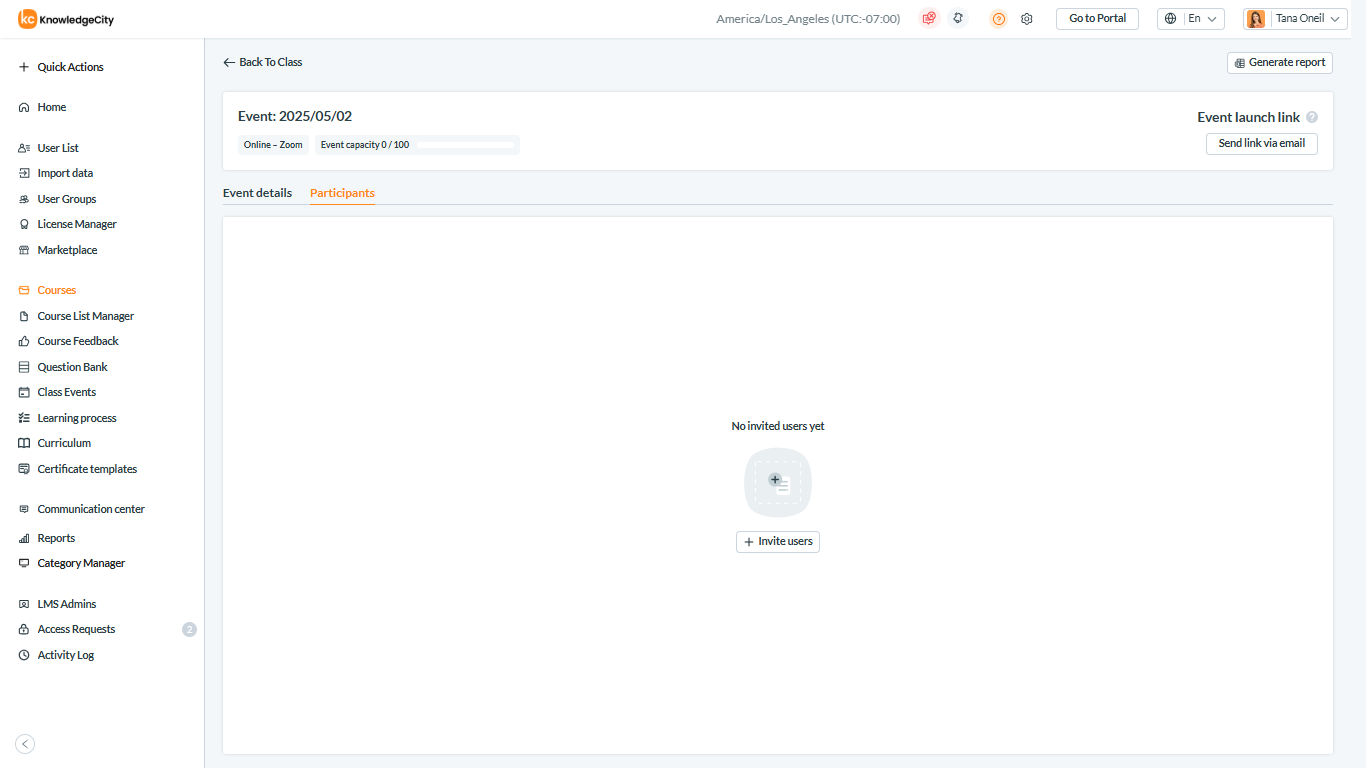
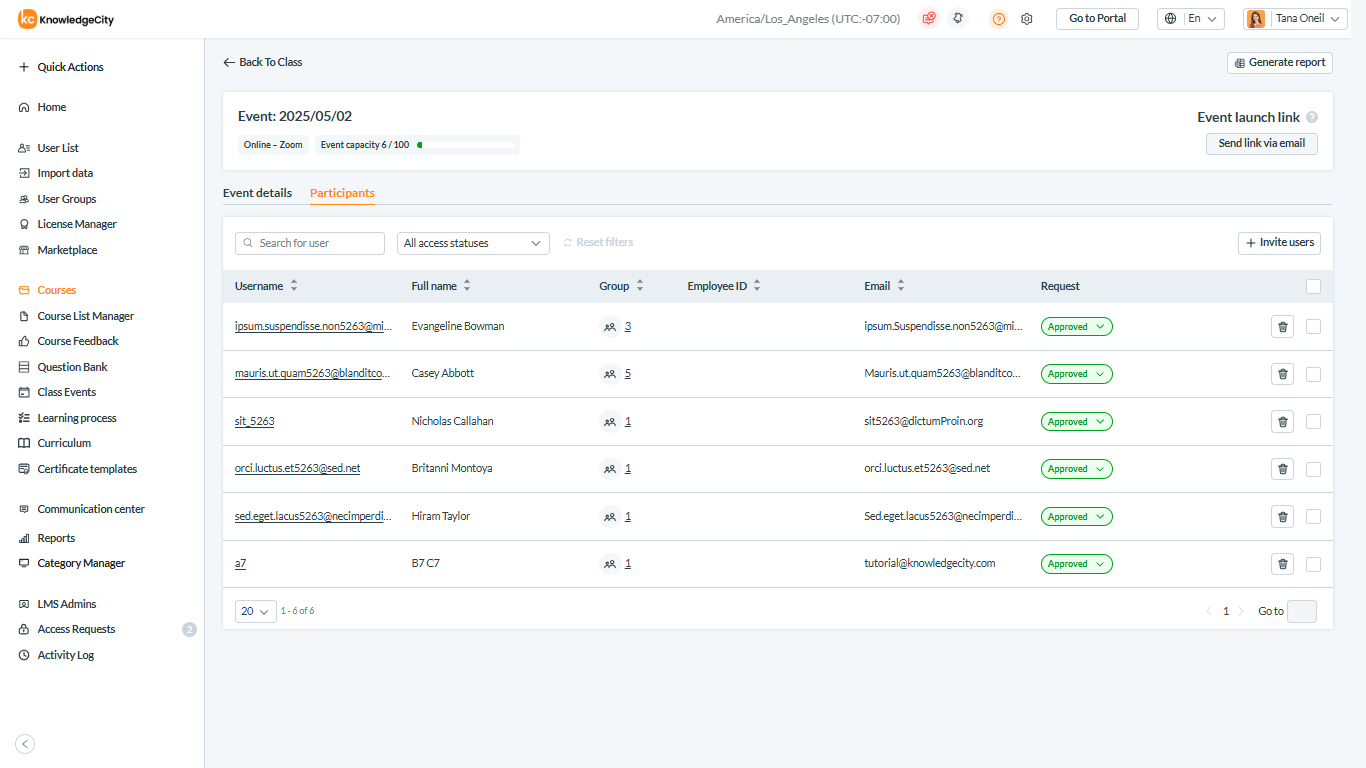
Step 5: Invite Participants
-
Invite Participants:
-
In the event page, select the Participants tab.
-
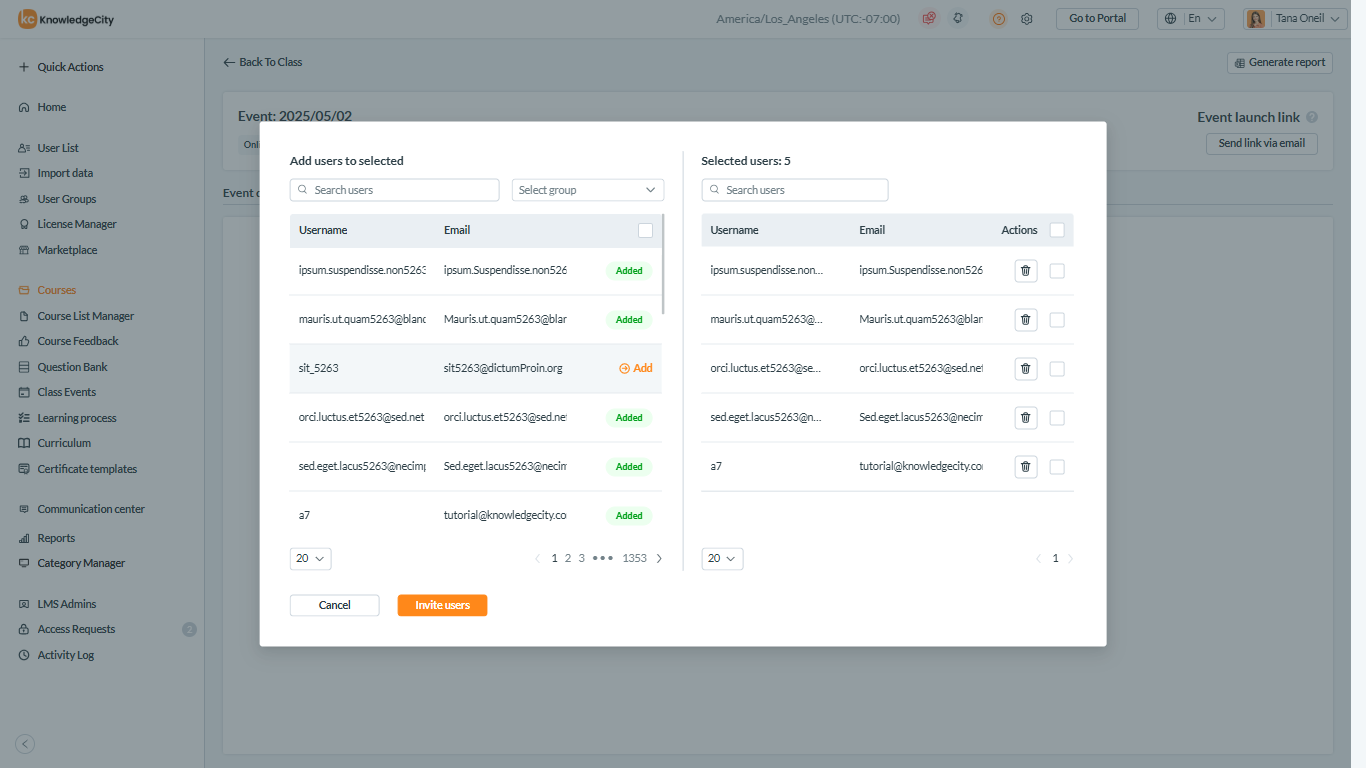
Click + Invite Users.
-
Search for and select the users you want to invite.
-
Click Invite Users.
-
(Optional) Add a message or comment in the pop-up window, then click Invite Users again to confirm.
-
-
Verify Participants:
-
All invited users will now appear under the Participants list for the event.
-
-
Event registration:
-
This can be used to allow users to request participation from the Portal. Use the auto approval process or follow the steps for manual approvals.
-

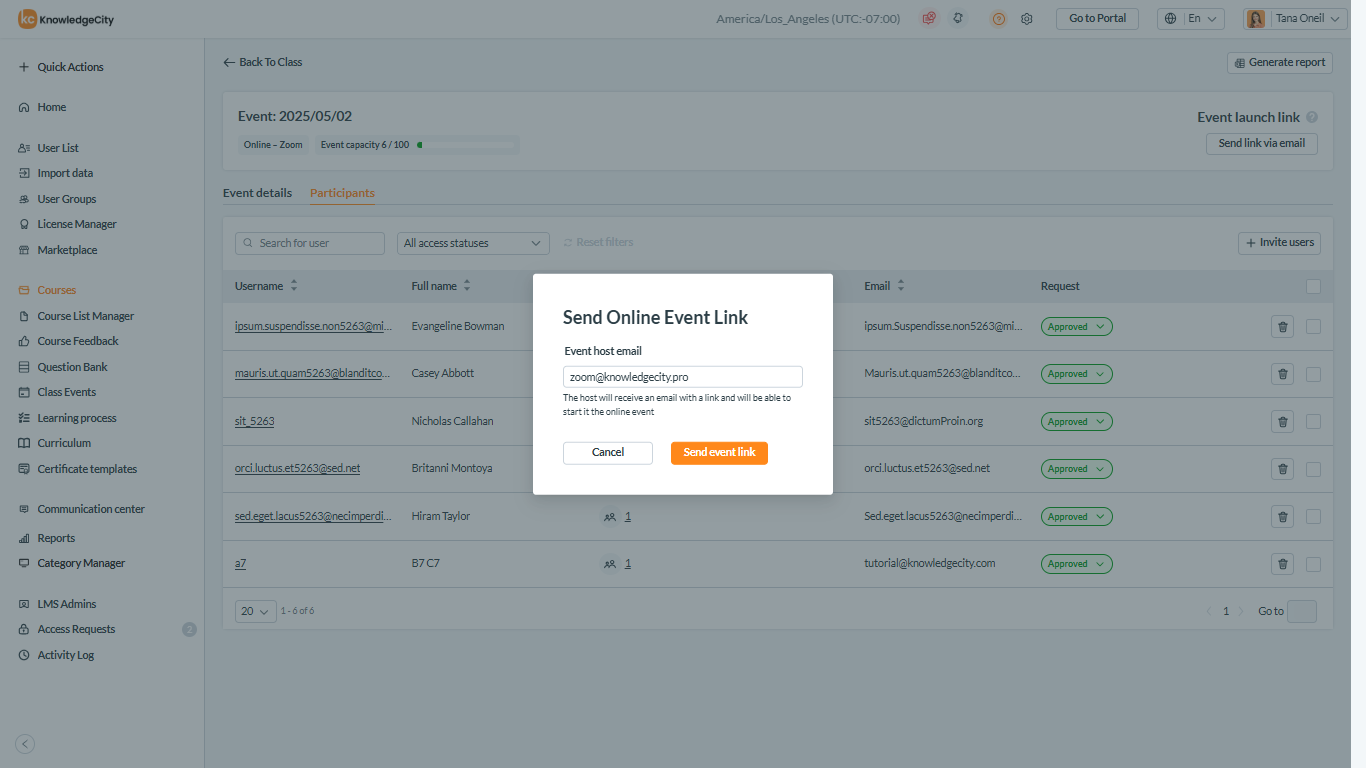
Step 6: Finalize and Send the Event Link
-
Fill in Event Host Email:
-
Return to Event Details and enter the Event Host Email.
-
-
Send Event Link:
-
Click Send Event Link.
-
-
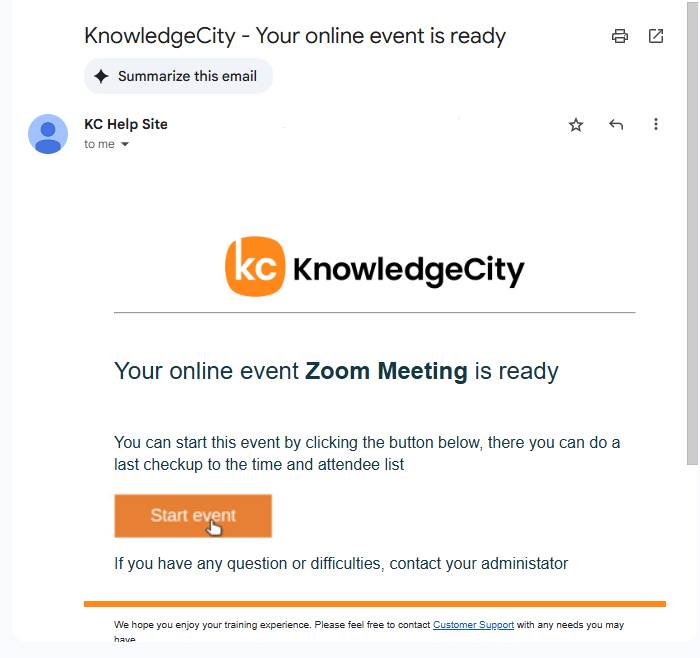
Confirmation:
-
You will receive a confirmation notification stating:
"Your online Zoom event is ready, and you can start the event by clicking 'Start Event'."
-
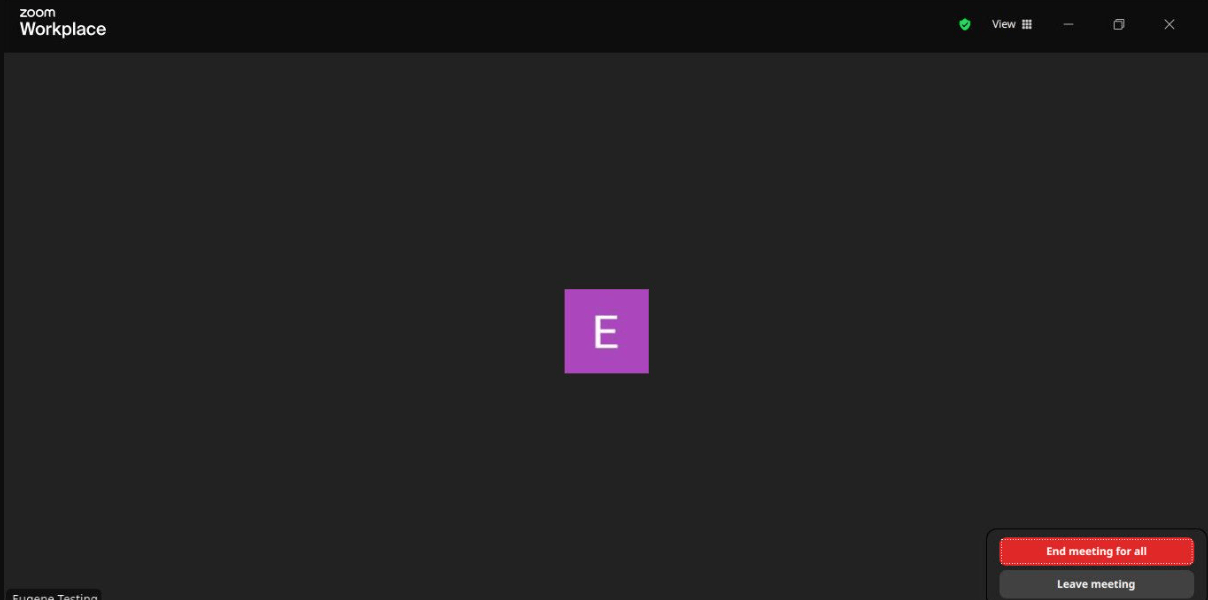
Zoom meeting launch screen will be shown and meeting can be launched
-
At this point, your online Zoom event is fully configured and ready for participants to join at the scheduled time.

Step 7 Ending Event and entering attendance information
-
After event is finished End the meeting for all
-
To enter attendance data, navigate to the Class Events, select the Zoom event
-
Choose the Participants tab and toggle the attendees that attended or missed it.

Additional Notes:
-
Ensure that your Zoom account used for integration has the necessary permissions to create and manage meetings.
-
Participants will receive automatic notifications once invited.
-
Issued certificates will be automatically available for download after event completion if enabled.
-
Zoom Integration can be removed by clicking the Remove Integration button in Integration Platform settings.
We sincerely appreciate your continued trust in KnowledgeCity. This Zoom integration feature was designed with your needs in mind—to make live learning more accessible, streamlined, and impactful.
If you need any assistance or have questions along the way, our dedicated support team is always here to help. We are committed to ensuring your success and are just a message away.
You can contact us here: https://support.knowledgecity.com/migration/knowledgecity-help-desk-operating-hours
Thank you for being part of the KnowledgeCity community—we are here to support your journey every step of the way!