Video Walkthrough
The Learning Process feature is your LMS hub to Learning Paths and Skill Paths.
Learning Paths allow administrators to develop and structure a set of courses to enhance the skills and knowledge of their team members. Acting as a tailored learning journey, Learning Paths guide learners through a series of courses and content that align with their development goals or job requirements. Here's how to create, edit, remove, and assign Learning Paths in the LMS.
Creating a New Learning Path
- Navigate to the Learning Path tab where you'll see a list of existing learning paths. If none exist, you'll be prompted to create a new one.
- Click the Create learning path button to open the Learning Paths creation page.
- Enter a Name and Description for the Learning Path. Use the Translate button if you need to add translations for these details.
- Add course lists by clicking either the New course list button or Existing course list button. The process for each will be explained in the sections below.
- Review the list of added course lists, adjusting the order, modifying blocking prerequisites, or removing as necessary.
- Click Save changes to confirm the new Learning Path.
- The system will then display the Edit Learning Path page for further modifications if needed.

An example animated illustration detailing the tooltip when creating a new learning path.
Adding an Existing Course List to a Learning Path
- While on the Learning Paths creation or edit page, click the Existing course list button.
- A new course list item with an unlocked icon (indicating no blocking prerequisites) will appear in the list.
- Choose the desired course list from the dropdown menu provided.
Creating a New Course List for a Learning Path
- Click the New course list button on the Learning Paths creation or edit page.
- Input a name for the course list, add any necessary translations and select courses from the dropdown menu.
- You can save this new course list to the Course lists manager by turning on the "Save to Course lists manager" toggle.
- After adding courses, the Total estimate field updates to reflect the selected courses.
Editing a Learning Path
- Select a Learning Path and click Edit.
- Add course lists as outlined in previous steps.
- Change names, descriptions, and translations as needed using the provided fields and buttons.
- Change the order of course lists using "drag and drop" icons and adjust blocking prerequisites with the "locker" icons.
- To remove a course list, click the Remove course list button next to the item.
- Once all changes are made, click Save changes and optionally choose to Send notification to users about changes.
- To delete the Learning Path altogether, select Remove learning path.
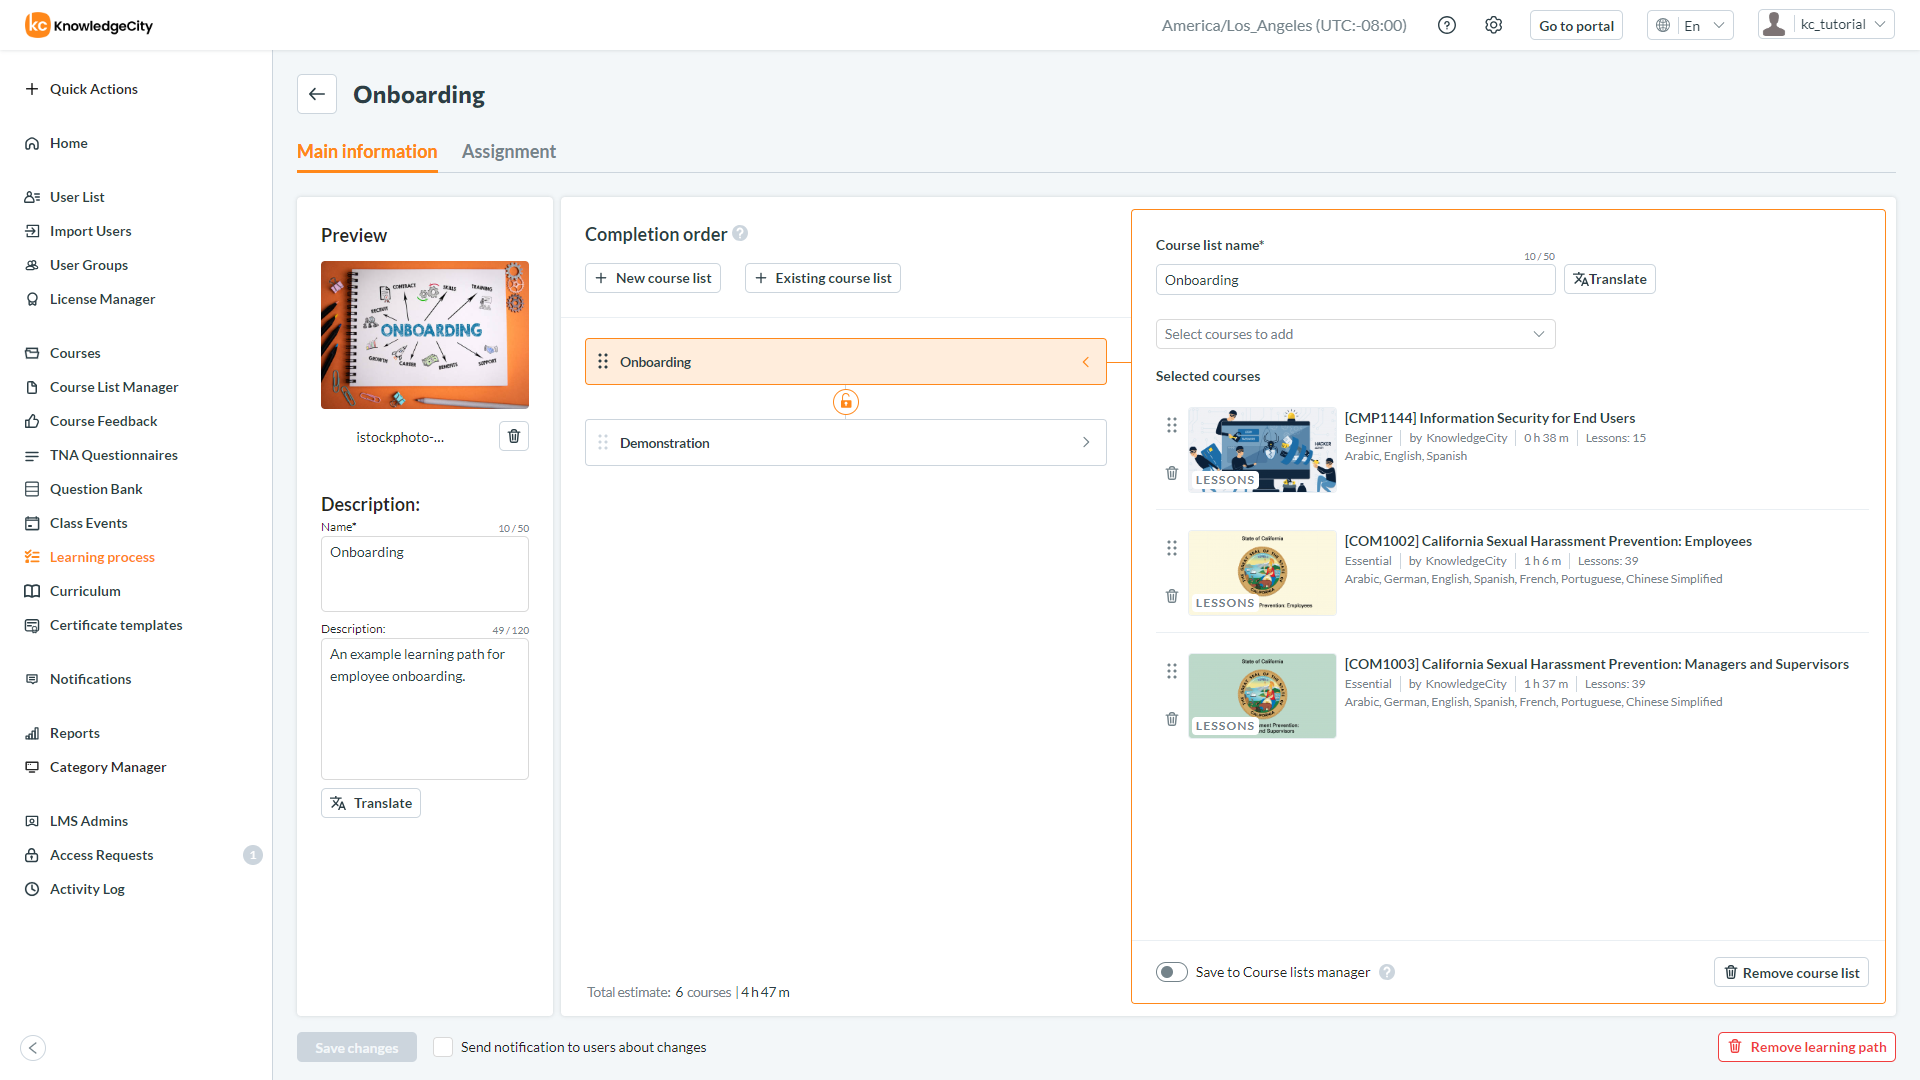
An example illustration detailing a newly created Learning Path with two example course lists
Managing Current Assignments of a Learning Path
- Access the Learning Path edit page and select the Assignment tab.
- To view group assignments, navigate to the Groups sub-tab; for individual user assignments, select the Users sub-tab.
- To check if the Learning Path is assigned to all students of the portal, visit the Assign to all sub-tab.
Assigning a Learning Path to Groups
- In the Assignment tab, under the Groups sub-tab, click Add groups.
- Choose groups from the left side of the form; selected groups will appear on the right side.
- Set start, end, and due dates for each group. Notify users if needed and click Assign and save.
- A success message will confirm the group assignments.
Optionally, Learning Paths can be assigned under the Assignments tab of a group profile.
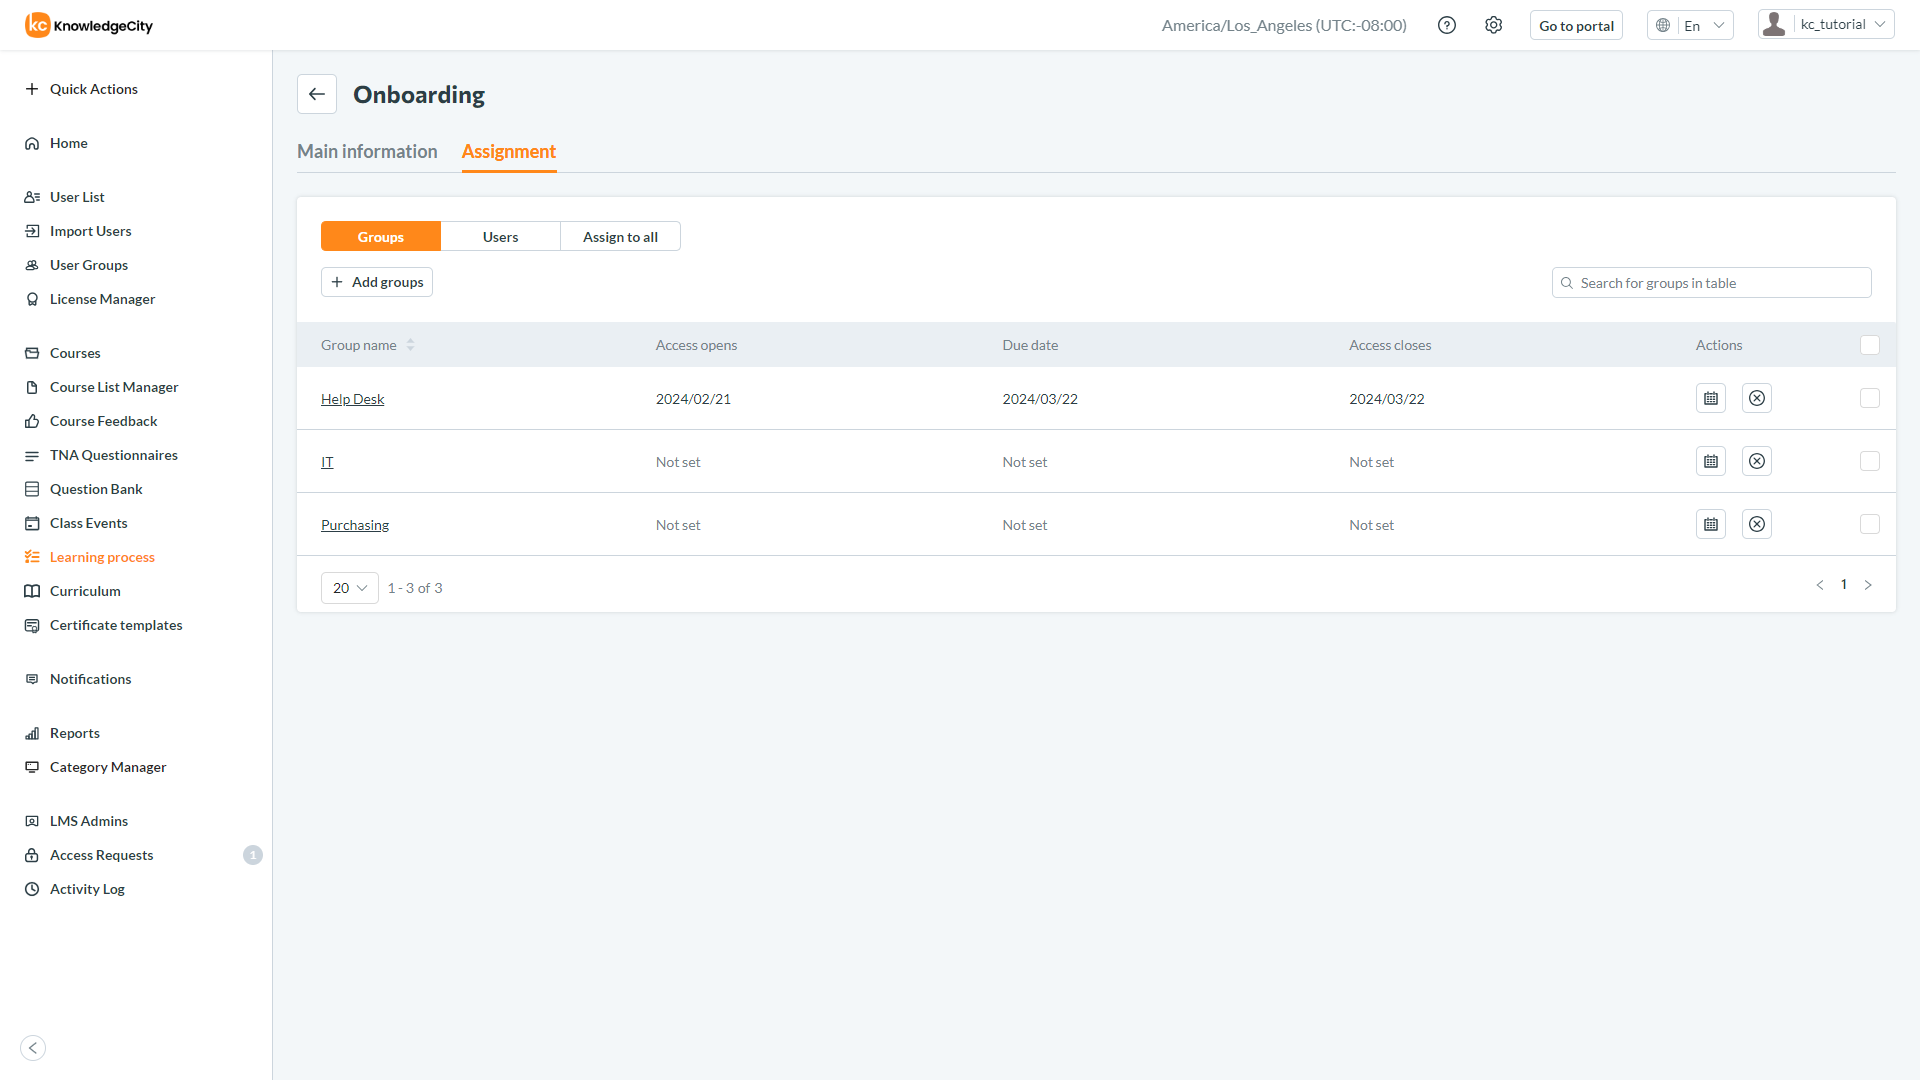
An example illustration of Assignment tab of the Learning process feature, detailing three Group assignments.
Assigning a Learning Path to Users
- Click the Assignment tab, followed by clicking the Users sub-section, then click Add users.
- Select users, and then set individual or collective start, end, and due dates.
- Optionally notify users and click Assign and save to finalize.
- A success message will display the current user assignments.
Optionally, Learning Paths can be assigned under the Assignments tab of a user profile.
Assigning a Learning Path to All Students
- In the Assignment tab, select the Assign to all sub-tab.
- Activate the Assign this learning path to all users and groups switcher.
- Set the global start, end, and due dates and click Assign to all.
- A notification will verify the assignment has been set.
Availability Periods and Due Dates
Setting a due date, or an availability period for a Learning Path, is an essential component of managing online education initiatives within the LMS. It helps ensure that learners complete their assigned courses in a timely manner and allows administrators to track progress effectively. In this article, we'll go through the process of setting a due date for a Learning Path.
Accessing the Learning Path
- Create or select a Learning Path and navigate to the Assignment(s) tab.
- Once a Learning Path has been assigned to a user or group, the Actions column will populate on the right-hand side of the page allowing you to schedule the assignment with an availability period or due date. (The calendar icon)
Setting the Due Date
A pop-up will appear allowing you to set the availability period and the due date for the course list. Fill in the due date and if necessary, the availability period, which defines when the course list is accessible to users. After entering your dates, click the Save button to apply the settings. You will be given the opportunity to notify users of the changes with a checkbox prior to saving your changes.
Verifying the Set Due Date
After saving, the system will update the list of course lists, displaying the due date / availability period in the Schedule column.
Email Notifications
-
The platform is designed to send automated email reminders to learners about upcoming due dates. Reminders are typically sent when due dates are 1, 3, 7, 15, or 30 days away. Notifications will contain all relevant due dates for the learner's assigned course lists.
-
Due dates are also visible to students on their My Learning page, enabling them to keep track of their progress and upcoming deadlines.