Video Walkthrough
Managing access requests is a crucial part of handling user management in the LMS. As an administrator in KnowledgeCity's LMS, you have the ability to approve or reject access requests from students. Below, you'll find simple instructions on how to manage these access requests within the LMS interface.
Viewers of your learning portal may request access to training using Access Requests. If someone needs access but has not yet been created as a user, they can request access by clicking the Request Access option in the portal and submitting the request form.
Once an Access Request has been submitted through the portal, the requests will be viewable in the Access Requests page of the LMS. A number may display to the right-side of the page label indicated the current number of pending requests.
Pending Requests Tab:
-
Access the Access Requests Module:
Navigate to the Access Requests tab on the left-side panel of the LMS. You'll see an icon indicating the number of pending requests next to the tab name. -
Generate a Report for Pending Requests:
- If desired, apply filters and click on Generate report to create a report with all pending requests.
- Upon confirmation, go to the reports section by clicking Go to reports.
- Select the top line in the list to view the full report, if required.
- To download, click on Download.
-
Reject Access Requests:
- To reject a specific request, click the X icon next to the corresponding request.
- Alternatively, you can select multiple requests using the checkboxes and click the Reject button at the top of the table.
- Confirm your action in the pop-up window. You may also leave a comment explaining the reason for rejection, which will be sent to the user if their email was provided.
- The LMS will send a notification to the rejected user and display a success message.
-
Approve Access Requests:
- Click the Approve button next to the request you want to validate or select multiple requests and click the Approve button at the top of the table.
- Choose the group you want to add the user to and select a subscription to assign a license from.
- Click Approve request to finalize the approval.
- A notification is sent to the approved user, and a confirmation message appears.
-
View Details of a Request:
- Expand any request by clicking the arrow button near it to view more details.
- Expand any request by clicking the arrow button near it to view more details.
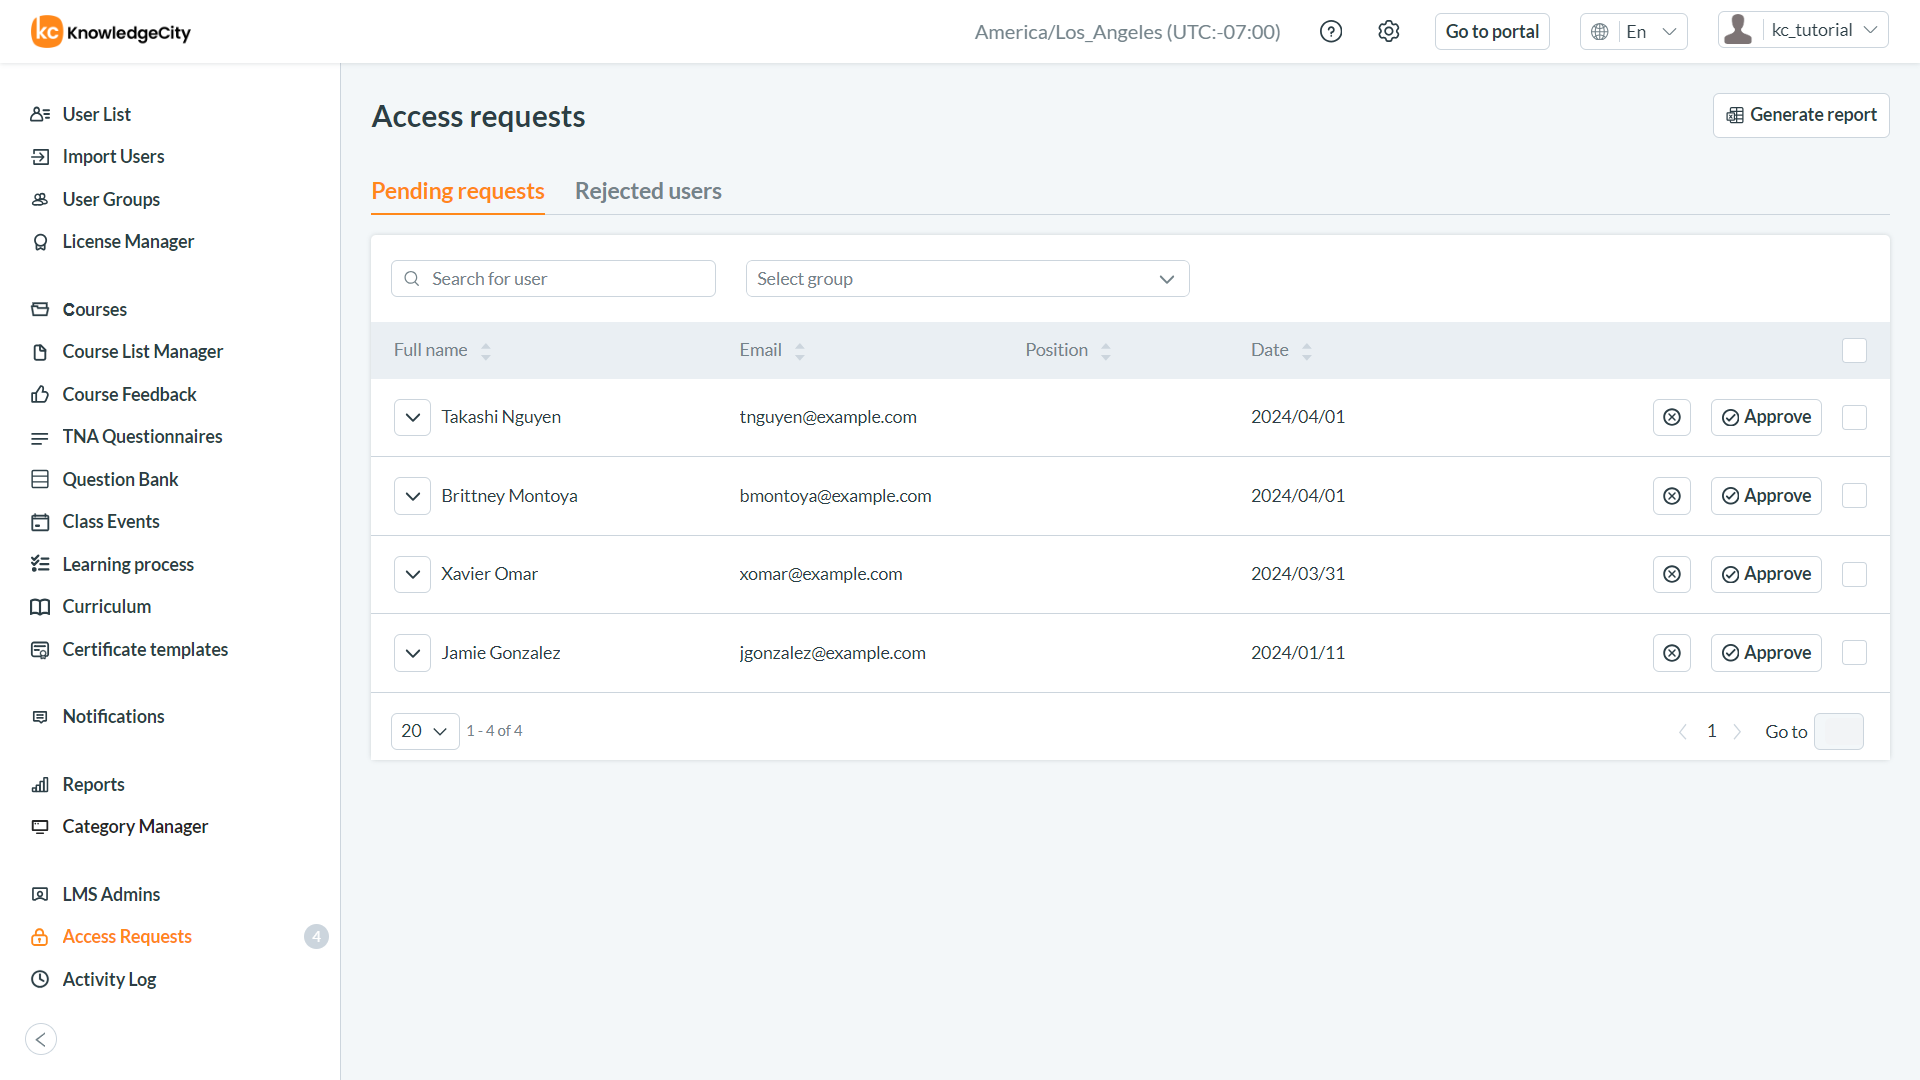
An example illustration of the Pending Requests tab in the Access Requests feature of the KnowledgeCity LMS.
Rejected Users Tab:
-
Access Rejected Requests:
Within the Access Requests page, click on the Rejected users tab to view a list of rejected access requests. -
Generate a Report for Rejected Users:
- Apply desired filters and click Generate report to create a detailed report.
- Navigate to the reports section and select the desired report to view.
- You can export the report by clicking on Download.
-
Remove Rejected Requests:
- Click the Remove button near the request you wish to delete or select multiple requests to remove.
- Confirm your action in the pop-up window.
- The LMS will display a success message and update the list of rejected requests accordingly.
-
Expand Request Details:
You can click the arrow button near any request to see more details.
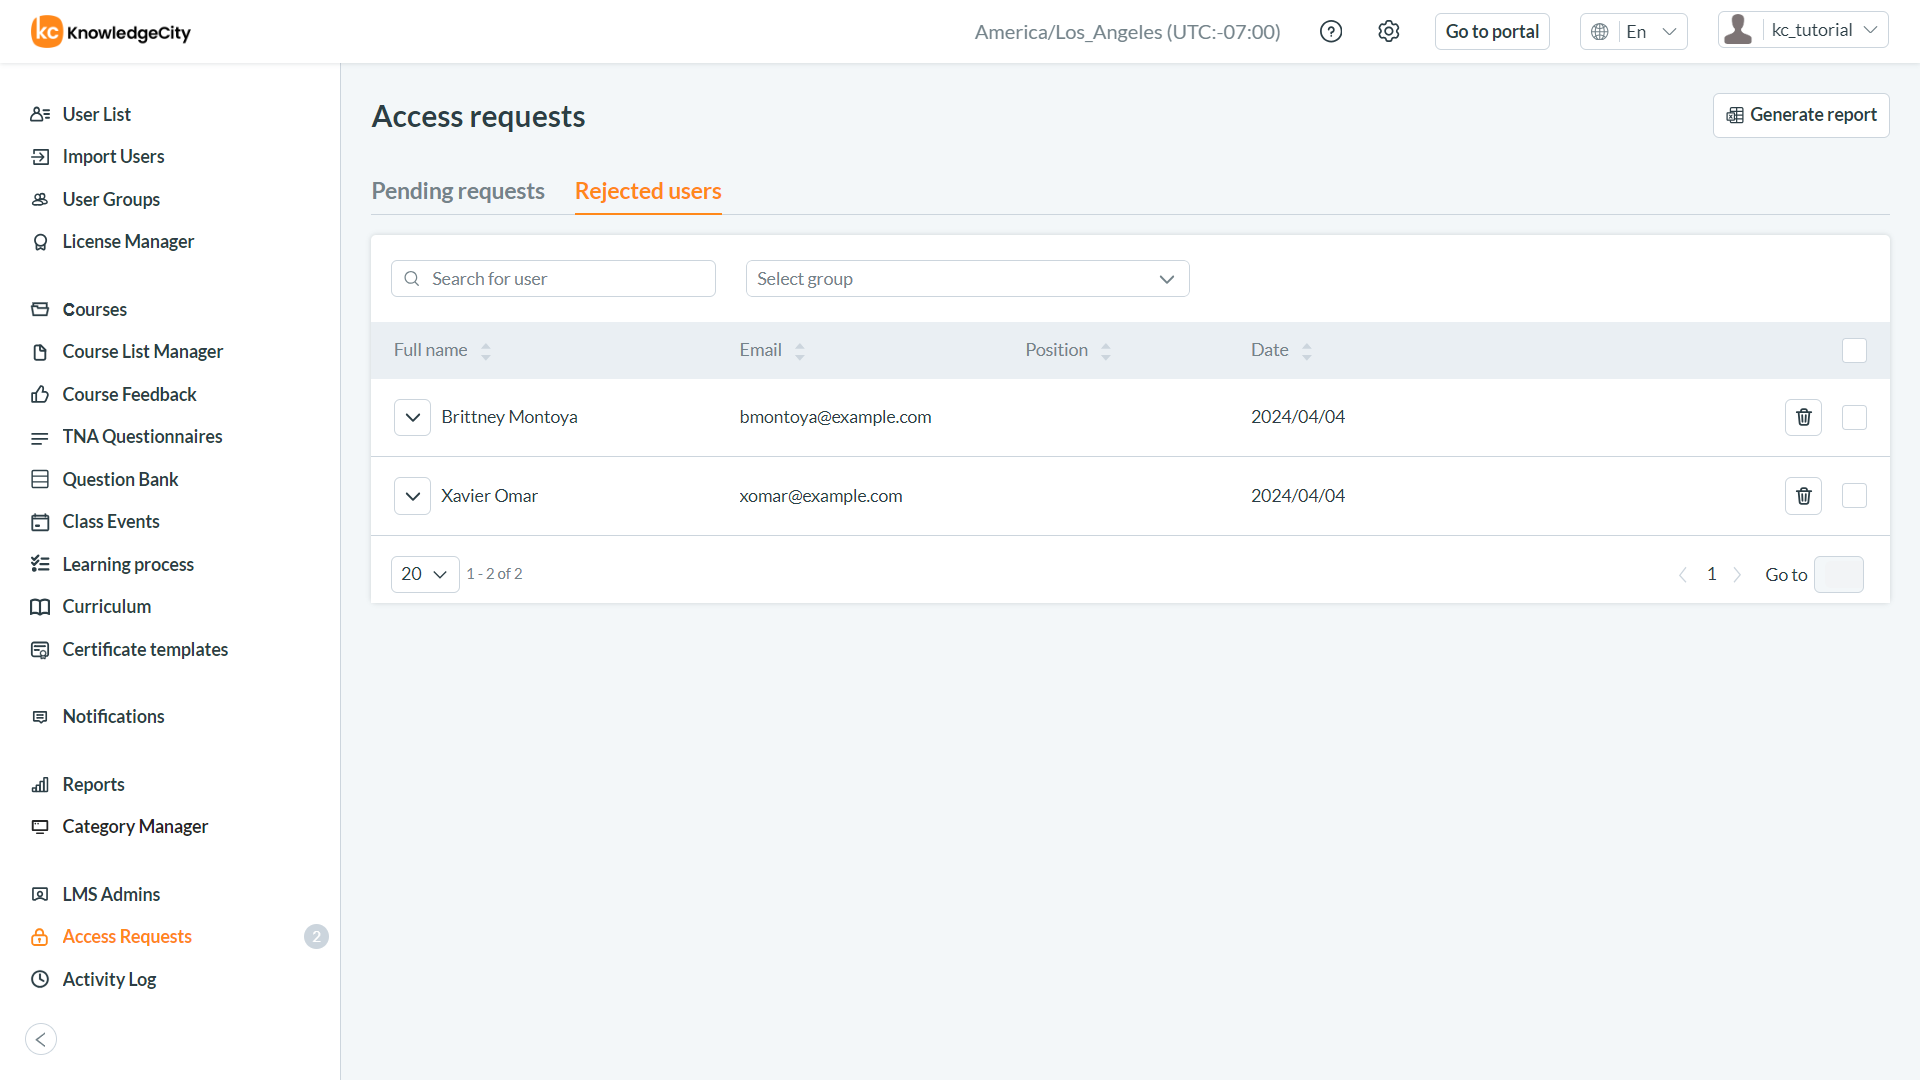
An example illustration of the Rejected users tab of the Access Requests feature.
Customizing the Request access form:
The Request Access contact form can be customized by an LMS Super Admin by clicking the gear icon in the top-right area of the LMS and selecting Form Settings:
The page will open to the Request access tab of Form Settings where fields can be changed, set as required fields or not, and made editable, using the toggle switches within the page. Custom fields can be created in the Custom Field Settings page and applied to the form settings.
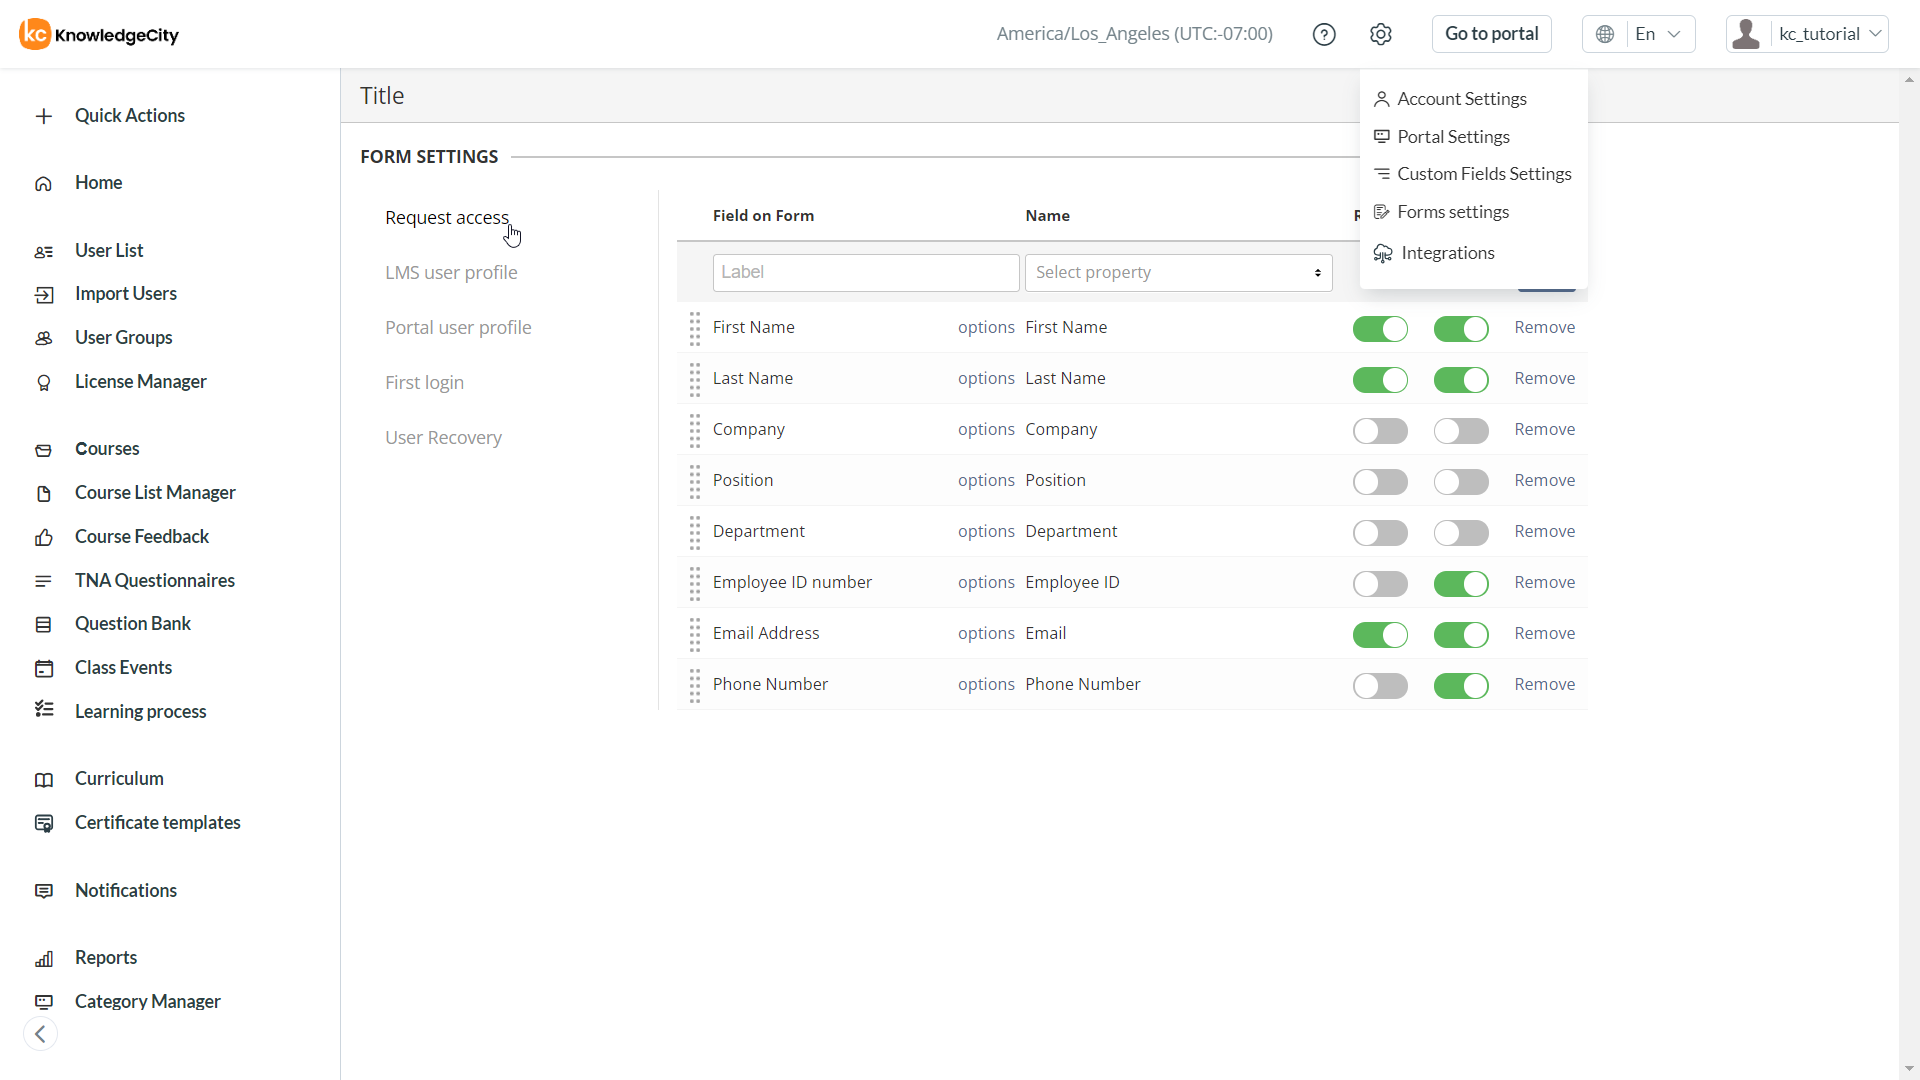
An example illustration of the Request access tab of the LMS Form Settings.
By adjusting the Request access form settings, users who request access can be required to provide additional information, if needed.
By following these steps, you can efficiently manage access requests and maintain a streamlined user management process within KnowledgeCity's LMS. These actions ensure that only authorized learners can access your course content and use your LMS resources.