Tailoring your learning portal to reflect your organization's brand and specifications is straightforward with KnowledgeCity's intuitive Portal Settings, found in your LMS settings. This guide will help to navigate through the portal settings and optimize your LMS experience for your learners. There are different categories of settings available that encompass both general and branding aspects, as well as additional tweaks and configurations.
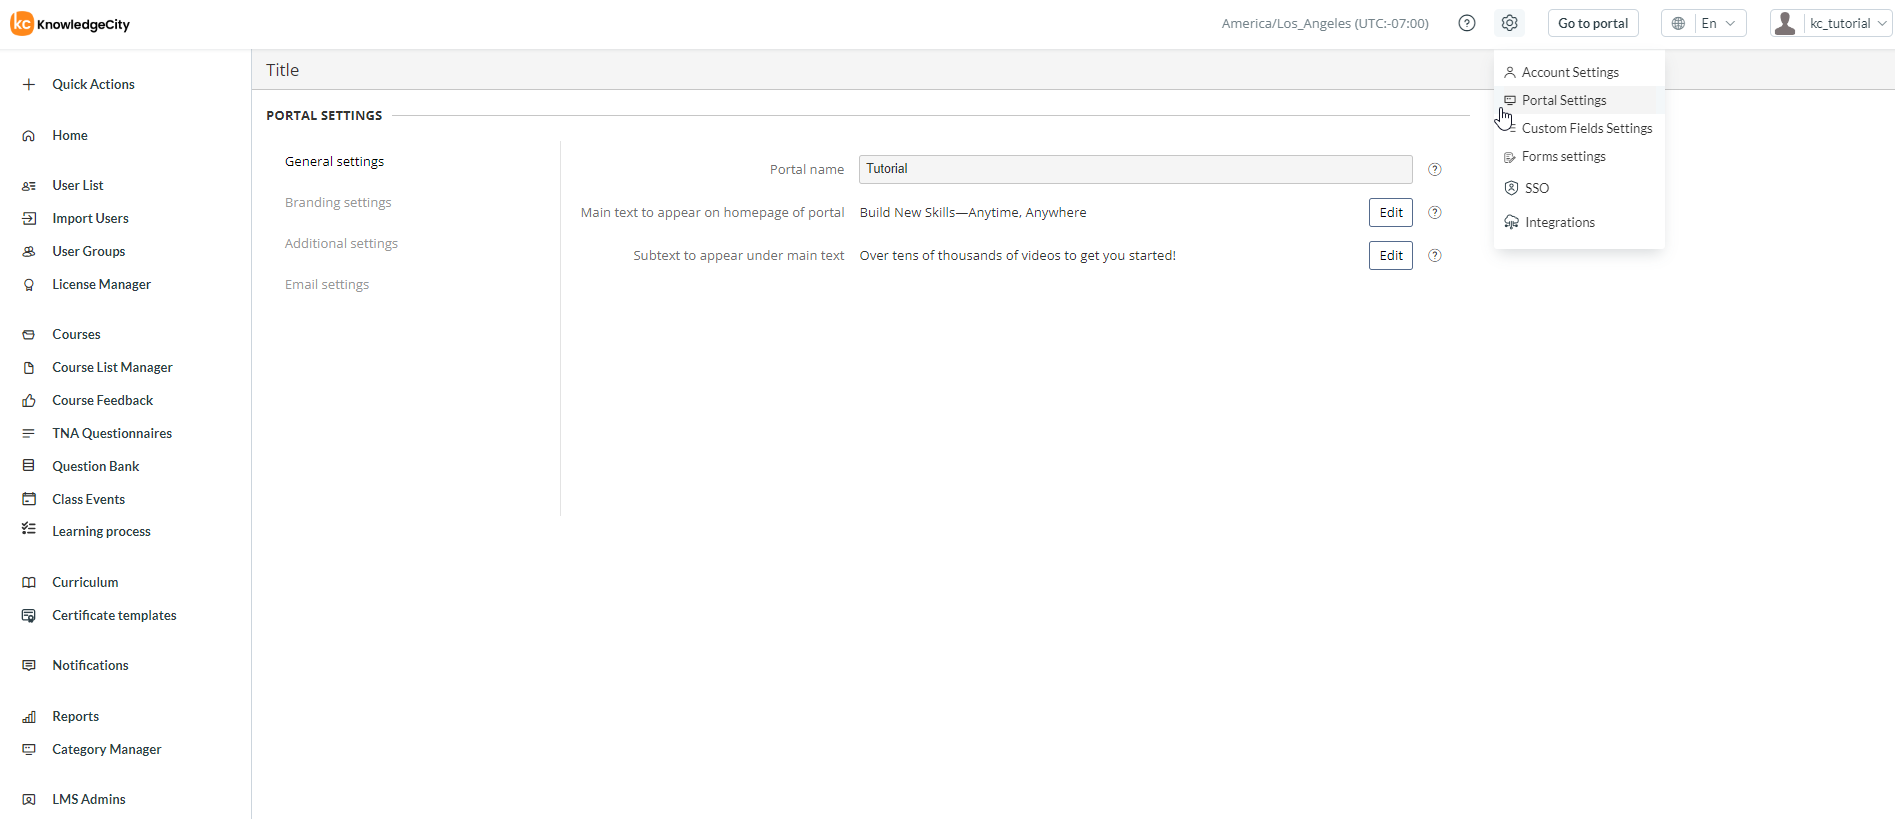
An example illustration of the General Settings page found within the Portal Settings.
Note that depending on your account type, some Portal Settings may not be available in your LMS. Portal Settings may not be available for a Content-Only or SCORM type account.
General Settings
Maximize your homepage’s potential by setting up your main text and subtitle to align with your company's messaging and language preferences. Here is how to do that:
-
Accessing General Settings:
- Select the gear icon on the top-left side and then choose "Portal Settings". This action will bring up the General Settings page.
-
Homepage Main Text:
- To modify the main homepage text, click the "Edit" button near the "Main text to appear on homepage of portal" field. Update the text for each portal language and save your changes.
-
Homepage Subtitle:
- Similarly, adjust the homepage subtitle by clicking the "Edit" button next to the "Subtext to appear under main text", make your updates, and save.
Branding Settings
Customize the look and feel of your learning portal with a range of portal branding options:
-
Accessing Branding Settings:
- Within Portal Settings, click on "Branding Settings".
-
Uploading Logos and Images:
- Modify portal logos, favicons, loading logos, and certificate previews by clicking the "Edit" button next to each field, uploading the desired image from your PC or device, and save.
-
Color Customization:
- Change the default portal colors, login page colors, inner page colors, and other elements by selecting the corresponding input, picking a color, and saving your choices.
-
Background Images:
- Customize your portal background settings by choosing between default backgrounds, uploading custom background images, or opting for no background at all with a solid color option.
- Customize your portal background settings by choosing between default backgrounds, uploading custom background images, or opting for no background at all with a solid color option.
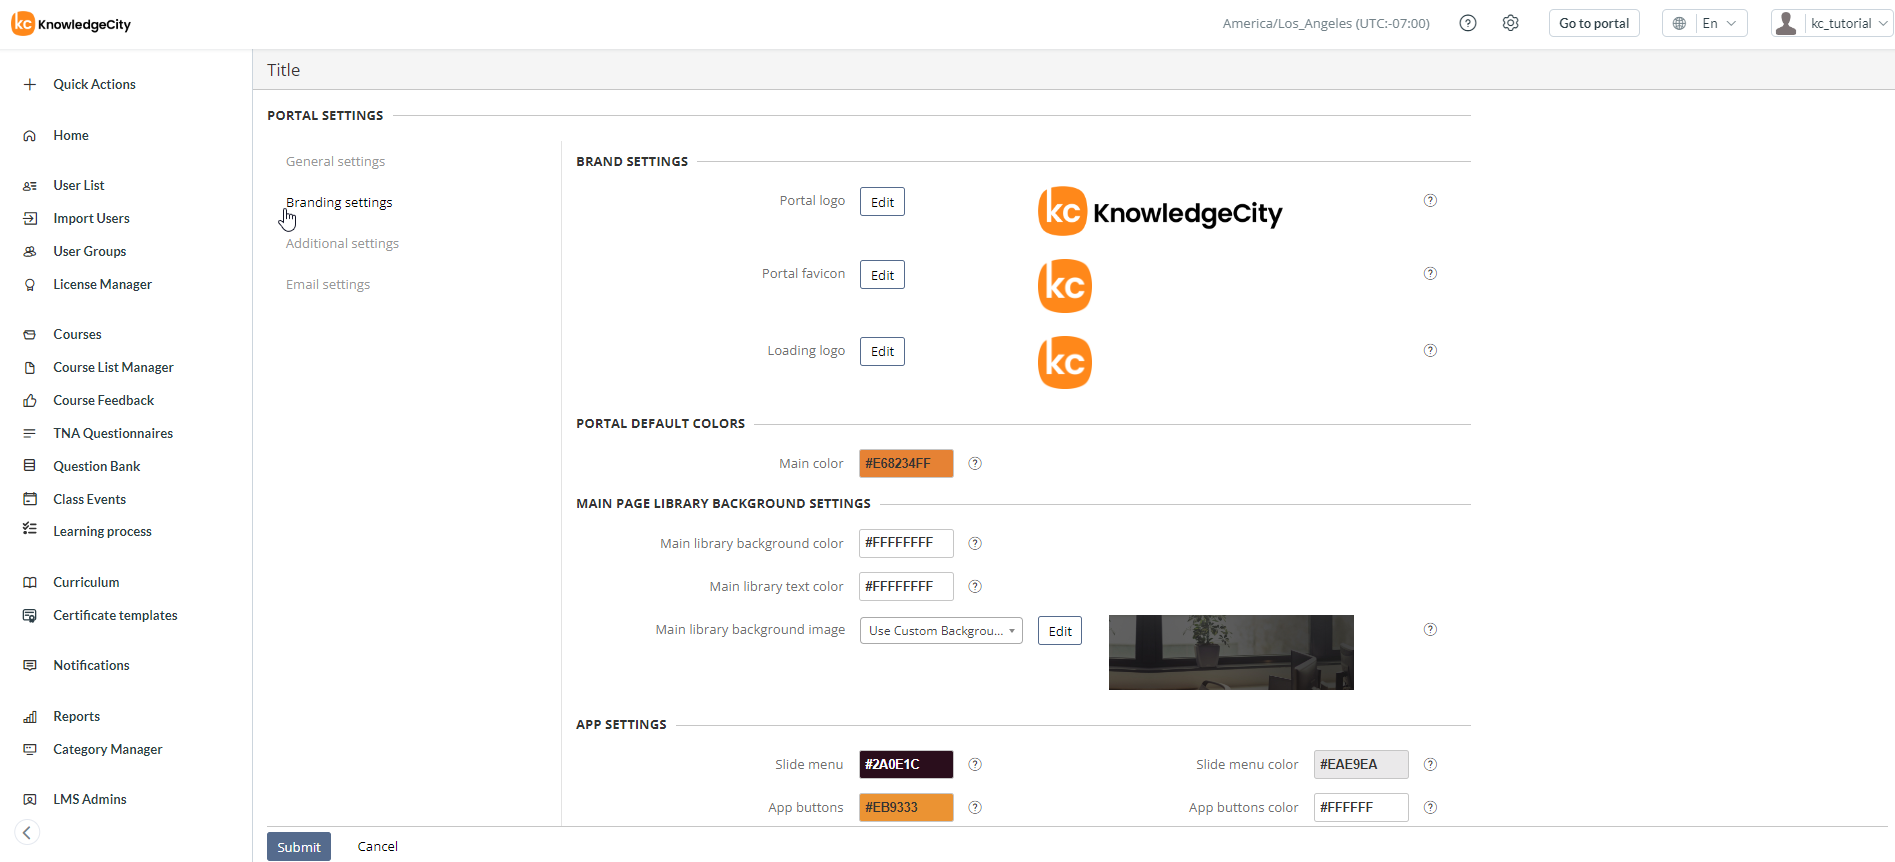
An example illustration of the Branding Settings page found within the Portal Settings.
Additional Settings
Customize additional aspects of your learning portal such as Google Analytics tracking, access request, privacy, certificate, and other miscellaneous settings:
-
Accessing Additional Settings:
- Click on "Additional Settings" within the Portal Settings. Here you will find various additional options for customizing your portal.
-
Fine-tuning Portal Settings:
- Add a Google Analytics Tracking ID, tweak options, user login requirements, and additional options.
Email Settings
Ensure that your email communications bear your brand’s mark with these customizations:
-
Configuring Email Settings:
- In Portal Settings, select "Email Settings". Here, settings for sender name, email addresses, and footer text can be modified.
-
Branding Email Communications:
- To change the email logo, click the "Edit" button, upload an email logo image for your PC or device, and save.
For additional settings options available in your LMS, please view our supplementary article covering LMS Account Settings.
Be sure the check our other available articles covering additional settings options.
Don't forget to save your changes after making adjustments in each settings tab to ensure your LMS looks and functions exactly as you desire. Enjoy personalizing your LMS and delivering a unique and powerful learning experience with KnowledgeCity.